
Overview
I recently noticed the silicone shot glass mold in the freezer. Seeing it there got me to wondering why I had never plopped a bunch of ice shot glasses in front of a group of children to see what kind of play would ensue. Wondering about that got me to wondering about ways to mold bigger glasses, which led to wondering about making ice bowls, which led to a whole week of experimentation, which led to the following DIY instructions.
Kids Should Be Doers
Before we jump in, I want to make a plea that you let children be part of all the Making.
It’d be fine (and probably quicker, less messy, and quieter) to make these ice creations on your own and then introduce them to kids. It’d be better-than-fine if they were an intricate part of the creation process. The Doing offers up rich opportunities for honing skills, solving problems, and acquiring knowledge.
Shot Glasses
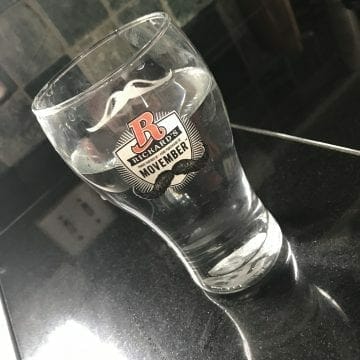
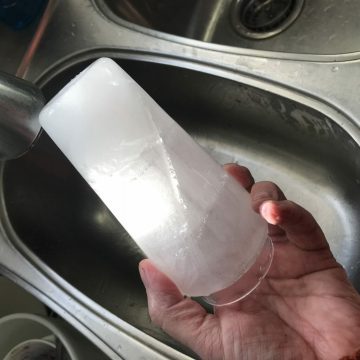
This is easy–in fact it kind felt a little like cheating. You start with an ice cube mold like this,
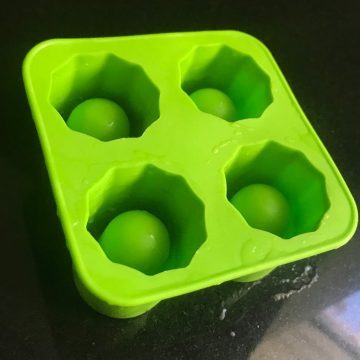
fill it with water, stick it in the freezer, and wait.
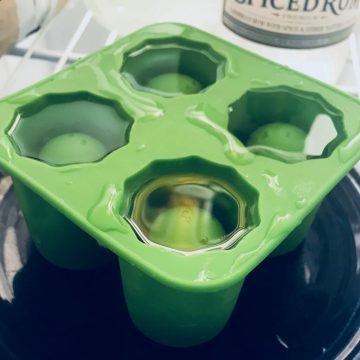
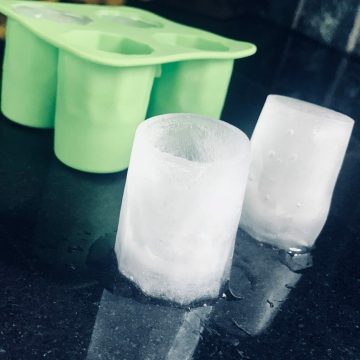
When the water turns to ice, just release them from the mold and you’re done. Freeze time was about 2 hours in the Explorations Early Learning test kitchen (which is, in fact, just our kitchen). You’ll probably want a bunch of these, so after emptying the mold, pop your new glasses onto a cookie sheet (or into a shallow container) and get them back in the freezer. Then you can make another batch. Repeat the process until you have enough for play.
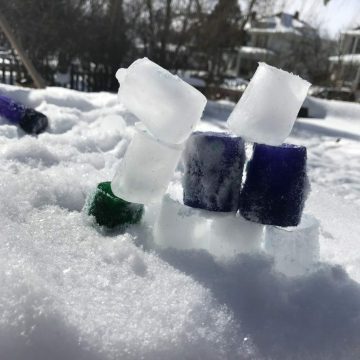
Bigger Glasses
This took some experimentation to get right and felt a lot less like cheating.
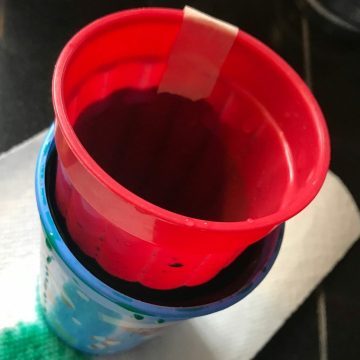
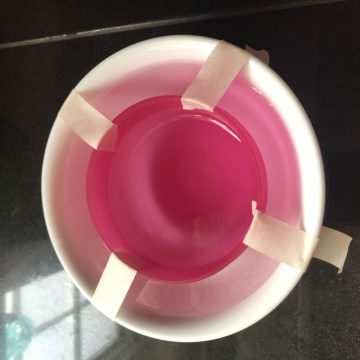
The basic idea is to fill a glass part way with water, suspend a smaller glass in the first with tape, and freeze it.
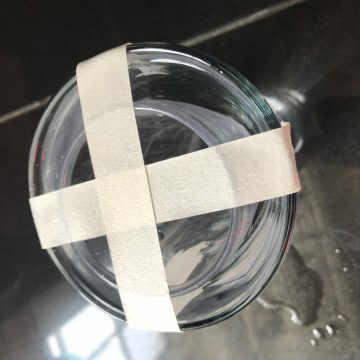
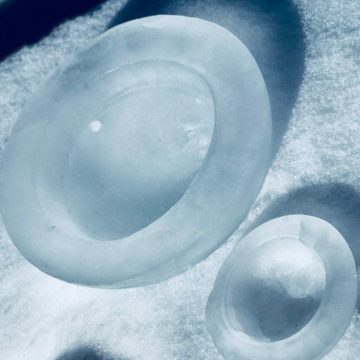
The result is a big version of the shot glass. The ones pictured below are about 7 inches tall.
The only real challenge is positioning the inner glass. There are two reasons for this. first, you’ll want it as close as possible to the center of the outer glass to assure that the walls of your ice glass have an even thickness. In one of my experiments, I placed the inner glass to far to one side and at a bit of an angle. That resulted in one of the walls being too thin. It melted and vanished as soon as it was removed from the freezer.
The second positioning issue to take into consideration is the depth of the inner cup. Placing it too deep will result in an ice glass bottom that’s too thin.
Ideally, you’ll want to position the inner glass so there is at least .50 inches of water at the bottom and .25 inches on the sides. Allowing even more space for water is probably better since that will mean stronger glasses that will take longer to melt. No need to get out a ruler, just eyeball it and feel free to experiment.
I used masking tape to secure the inner glass because that’s what I found first when I did a lap around the house tape hunting. Scotch tape or duct tape will do the job just as well if not better.
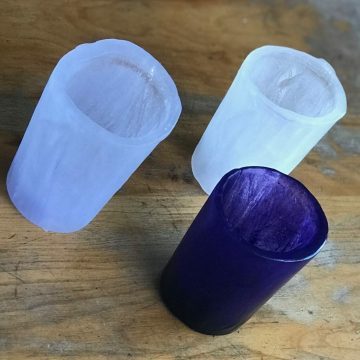
Selecting the glasses you use for your ice cube mold is pretty simple. You’ll need to consider two things: 1) will the cups slip apart after the water freezes and 2) are the cups different enough in size. The above photo shows poor selection on my part. The glasses were too close in size and it was a but of a pain to get the inner cup positioned. A smaller cup would have been easier. The photo below is an example of a glass I would have loved to use, but couldn’t because I could not have successfully removed the ice in one piece.
Once the inner glass is securely in position, add a bit of water if needed (it’ll expand a bit as it freezes, so don’t fill too full) Then pop it into the freezer for at least 4 hours.
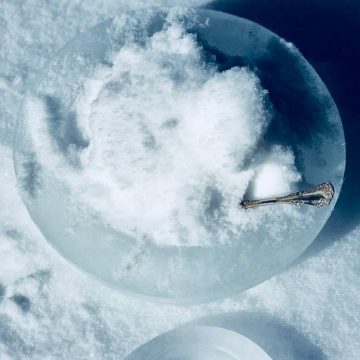
Bowls
Once I got comfortable producing glasses, I decided to move on to bowls. Why? Somehow I got to thinking that it’d be great fun to be a 3 year old eating ice cream out of a bowl made of ice on a hot summer day.
The process is the same. Make sure there is a decent size difference between your outer and inner bowl.
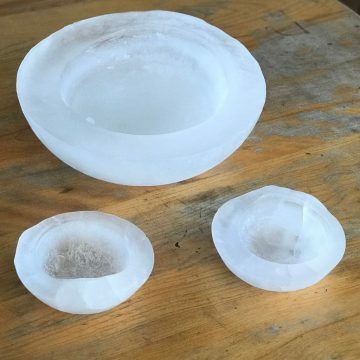
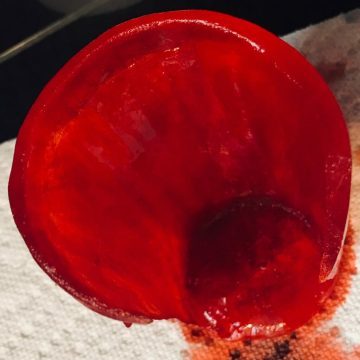
Leave plenty of room on the sides and bottom. You can see in the above photo that the lower left bowl has a very thin wall on one side–you can almost see through it.
I did find it was easier to position the inner bowl if I added a bit of water to it. Just enough water sank it down to the desired depth and that mean less work for the tape.
The small bowls I made took about 4 hours to freeze. The big one, which measured about 14 inches across, wasn’t completely frozen for nearly 24 hours.
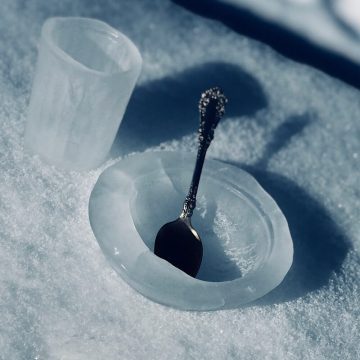
Releasing Your Creations
Releasing your frozen creation from it’s mold isn’t hard. Just remove it from the freezer, flip it upside down, and hold it under warm running water until the outer glass/bowl slips off. To remove the inner glass/bowl, just flip it right-side-up, fill the inner container with warm water, and wait for it to loosen. It never took more than a few minutes. You can use hot water to speed things along–but that will probably result in some cracking.

After releasing your ice cube glasses and bowls, pop them back in the freezer until you’re ready to use them.
Play Ideas
It’s the rare child that does not instantly come up with her own ideas for playing with novel creations like these, so my first and favorite play idea is to simply plop the ice creations in the play space and let things unfold–offering support as needed. I know not all adults are comfortable with such open-endedness, so I’ll share a few more specific ideas.
- Water Play. Add your ice creations to a tote of water and let play happen. Cold water will help your glasses and bowls live longer.
- Outside In The Cold Play. What could be better than a bowl of snow on a chilly winter day?
- Block Play. If it’s stackable it’s a block.
- Sand or Mud Play. I know they’d be instantly coated in mess–and that’d be awesome.
- Dramatic Play. Seems to me that glasses and bowls, even glasses and bowls made of ice, will trigger dramatic play.
Notes
Here’s a couple notes to wrap things up.
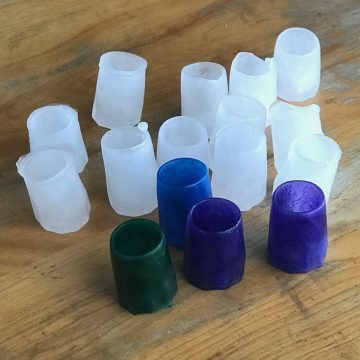
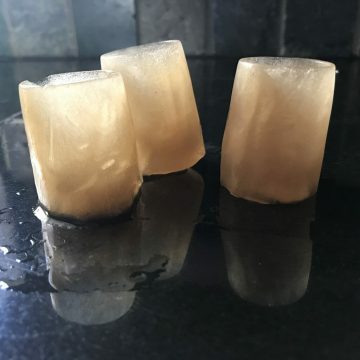
- Add Coloring. As the photos show, I made some of my experimental creations up using colored water. They look great, but can be quiet messy when they start melting. Whether that’s a good thing or bad thing is up to you. Another way to add a bit of color is to use tea. As you can see in the photo below, it creates ice with a bit of tint and is much less messy when it melts. I just poured warm tea into my mold and froze it.
- Container Material. I experimented with many materials: plastic, glass, stainless steel, and whatever the breakable cereal bowls in my kitchen are made of. They all worked fine. The only difference I noticed is that the ice released quicker from the glass and stainless steel containers.
We’d love to read your thoughts, ideas, and insights in the comments below and we’d LOVE to see photos if you give this a try.
Contribute content to Playvolution HQ
Brought to you by Explorations Early Learning
Browse Trainings


Post Author
Jeff Johnson is an early learning trainer, podcaster, and author who founded Explorations Early Learning, Playvolution HQ, and Play Haven.
Leave a Reply