
Classroom Pulley System Overview
What’s a classroom pulley system? It’s basically the best thing ever if you’re a young child interested in gravity and other STEM topics. The various pulley systems I installed for the kids to play with back in our family child care days were very popular with the kids in our care. Pulling the rope and hoisting a bucket of toys up to the ceiling left kids feeling strong and powerful. It also helped them learn about cause and effect relationships, hone problem-solving skills, refine visual tracking skills, build muscle strength and control, and much more.
Installation should take less than thirty minutes and supplies will cost under $20.
Classroom Pulley System Ages
In my experience, preschool children from under two-years-old enjoy a classroom pulley system. Many school-aged kids dig pulley play too.
Classroom Pulley System Materials
Classroom Pulley System Directions
Here’s a quick overview of how to install a pulley system in your early learning classroom:
Install A Ceiling Hook
You need to install a hook in the ceiling to which you can attach the pulley. Location matters. I recommend placing the hook towards the center of the room, so there’s a wide play area when possible. A close-to-a-wall pulley will work, but we’ve found it restricts pulley play related movement. It also tends to result in a bucket clunking against the wall as it ascends and descends.
You should also consider what’s below your pulley hook. For example, placing it above the block play area makes sense, while placing it above the reading nook invites trouble.
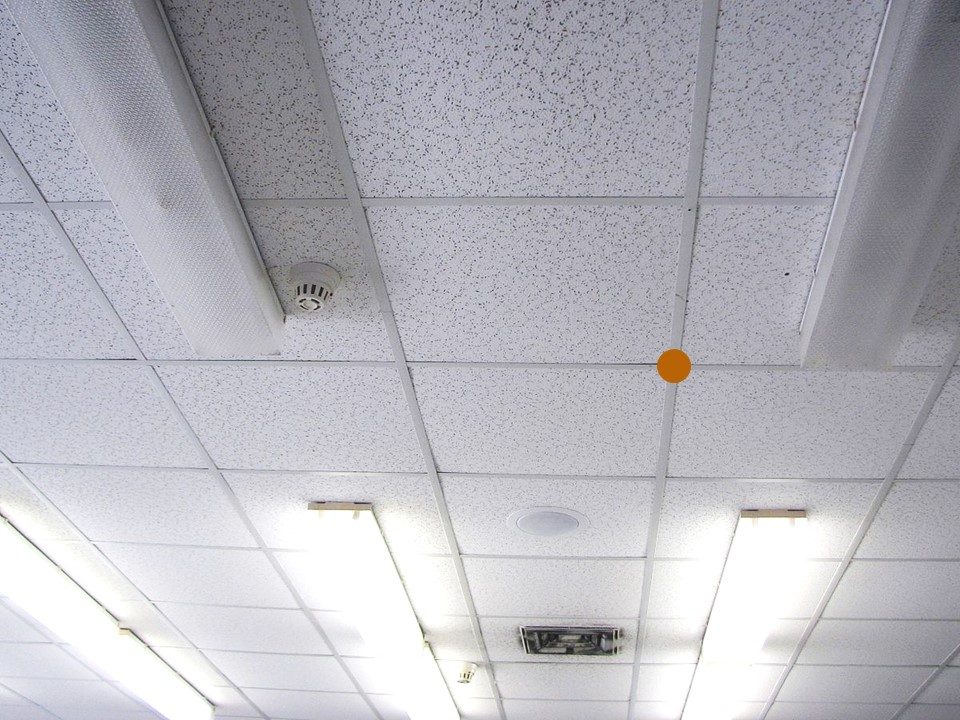
How you install your hook will depend on your ceiling. If you have a suspended ceiling, you’ll want to use a specially made hook like this:
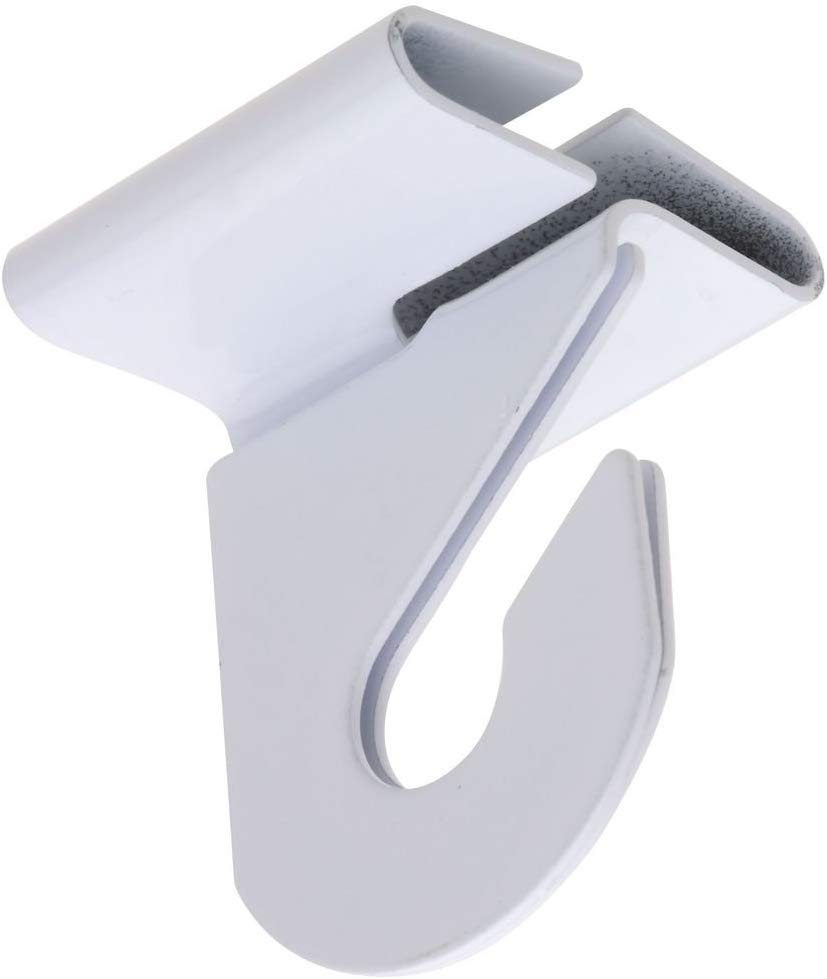
For best results, install it as close as possible to where the tile grids intersect (see below). These intersections are strong points in the grid.
If you have a plaster ceiling and can locate a ceiling joist, you can drill a pilot hole and twist in a hook like this one:

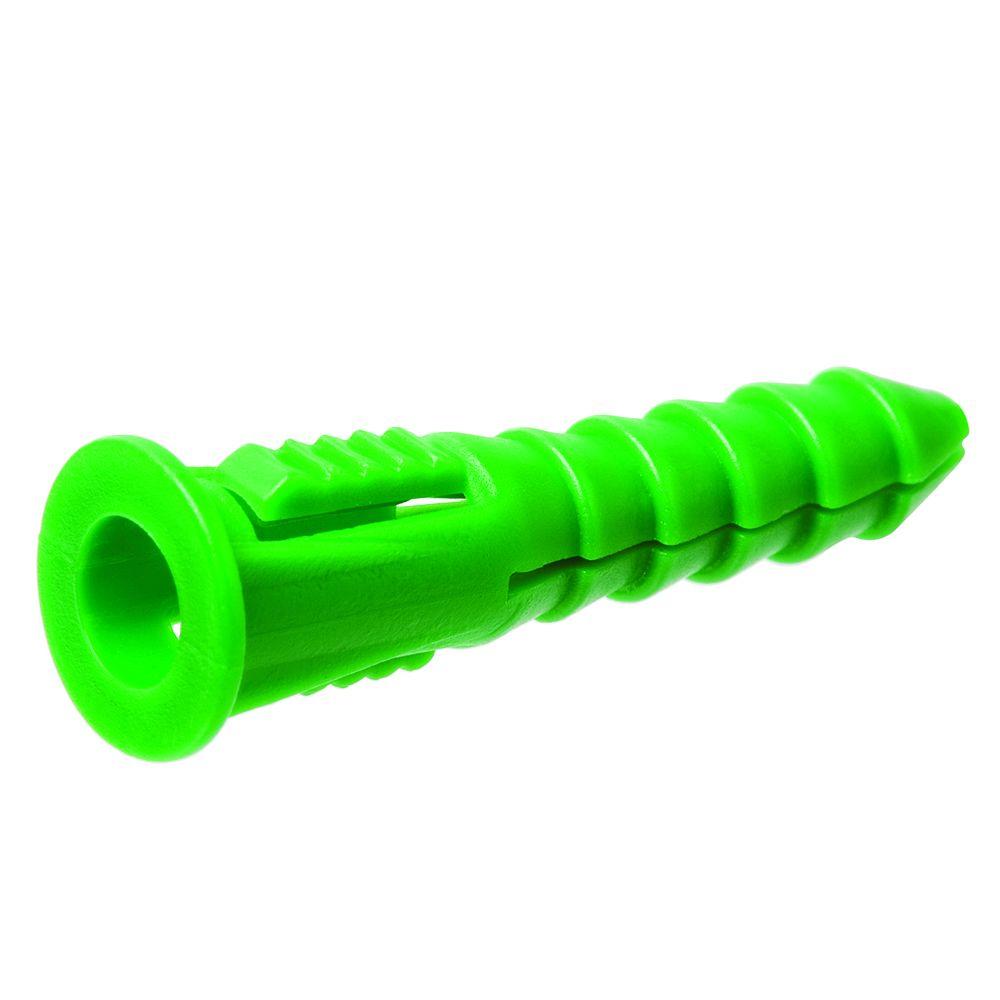
If you’re unable to locate a ceiling joist, you can drill a hole, install a plastic anchor like the one below, and twist in your hook.
If you’re unsure of how to install a hook in your ceiling, and do not have anyone who can help you, you can contact me, and I’ll happily offer some assistance.
Attach The Pulley
If you used a suspended ceiling hook, you’ll need to attach the pulley to the hook with some wire or cable ties. I recommend cable ties because they are easier to use. If you installed a twist in hook, you just need to hang the pulley on the hook.
Add The Rope
Securely attach one end of your rope to the bucket, and then thread the other end through the pulley. Now, cut the rope to length–just trim it so that the non-bucket end touches the floor. Next, tie a big knot in the end of the rope so that it will not slip through the pulley. That way, you will not have to reinstall it every time the kids pull the rope from the bucket side of the pulley.

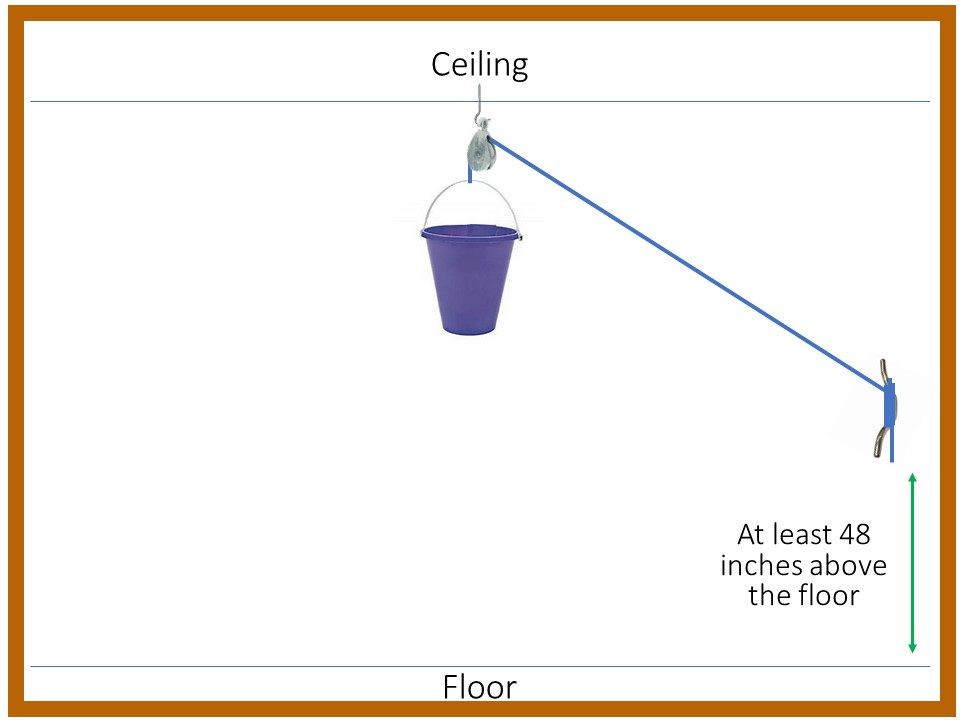
Add The Wall Cleat
Now, install the wall cleat at least 48 inches from the floor. Why that high? So that it’s hard for kids to access it. When the pulley system is not in use, you can pull the bucket to the ceiling and wrap the rope around the cleat to restrict access.
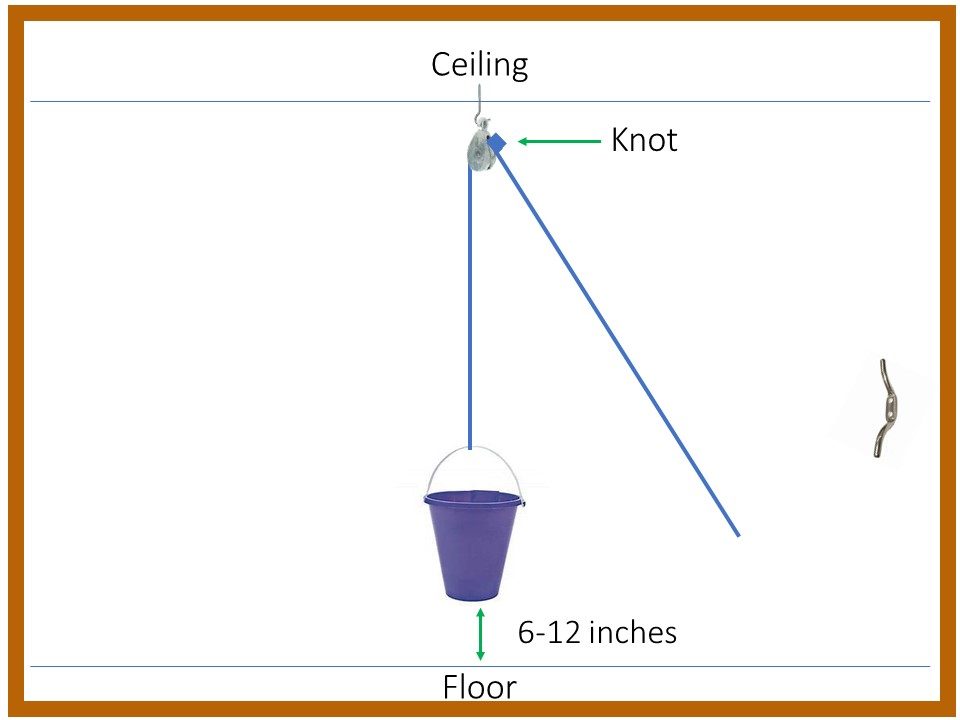
Consider A Well-Placed Knot
After months of play with our first classroom pulley system, we became a bit annoyed with one thing–the repeated CRASH when the kids let go of the rope and allowed the bucket to hit the floor. Instead of cancelling pulley play or creating rules that’d be nearly impossible to consistently enforce, we added a knot. It turns out that you can prevent your bucket from clashing to the floor by tying a well-placed knot (see the below image). Just tie a knot on the non-bucket side of the pulley so that it will stop the bucket 6-12 inches from the floor.
Classroom Pulley System Options
Here are some options we’ve tested and enjoyed over the years:
Consider A Second Rope
Adding a second rope as illustrated below will allow the kids to move the bucket horizontally as well as vertically. Cooperatively (and with enough rope), a pair of kids will be able to move the bucket to almost any location in the room.

Add More Pulleys
At one point, we had a pair of pulley systems in our play room that each used a series of three or four pulleys. This allowed kids on one side of the room to lift a bucket that was 15 or 20 feet away. To set up a multi-pulley system, you just need to install more hooks and pulleys and use a longer rope.

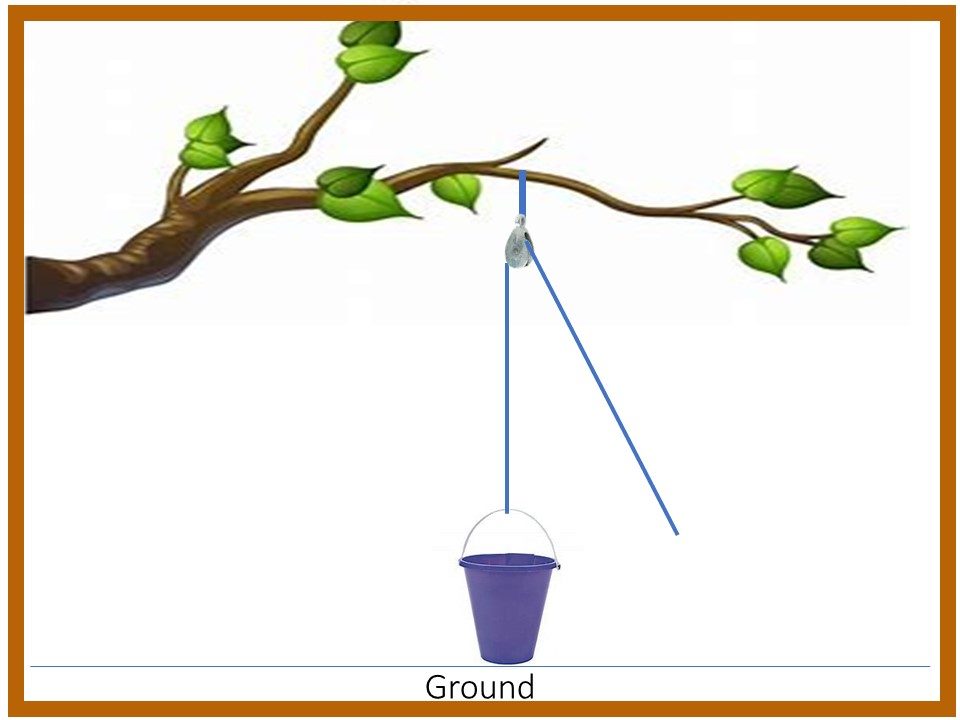
Take It Outside
You can also take your classroom pulley system outside the classroom. With a bit of rope, you can install a pulley to a sturdy tree limb, as illustrated below. When not in use, you can pull the bucket up and tie the rope to the tree.
Obligatory Classroom Pulley System Safety Notice
Rope play needs to be appropriately supervised. If the responsible adults are not going to pay attention to pulley play, don’t make the pulley system available. To keep rope play safe, help kids understand why they should not wrap rope around their necks or other body parts. You may want to complete a Benefit / Risk Assessment for your pulley system.
Speaking of safety, here are some things not to do. They are all based on real experiences people have shared with me over the years:
- Do not attach your pulley system to a ceiling fan.
- If you do attach your pulley system to a ceiling fan, do not turn on the ceiling fan.
- Do not attach your pulley system to a ceiling tile by poking a pair of holes in a tile, threading a wire through the holes, slipping the pulley on to the wire, and twisting the wire ends together. As soon as something moderately heavy is lifted in the bucket, the tile will give way and fall.
- Do not place a water play station close to the pulley system and react with surprise when children start hefting buckets of water towards the ceiling.
- Do not lose track of classroom pets. At some point, an adventurous child will decide the class guinea pig needs to ride in the pulley system bucket.
Classroom Pulley System Conclusion
If you decide to install a classroom pulley system, I recommend letting kids help with the installation as much as possible, here’s a post with five reasons why. I’d also love to hear from you in the comments if you have questions or want to share stories or photos of your experiences with pulley play.
Contribute content to Playvolution HQ
Brought to you by Explorations Early Learning
Browse Trainings

Post Author
Jeff Johnson is an early learning trainer, podcaster, and author who founded Explorations Early Learning, Playvolution HQ, and Play Haven.
Leave a Reply