
Overview
Using a hammer is a way for young children to feel powerful and make noise while refining large and small muscle strength and control, honing hand-eye coordination and visual tracking skills, learn about simple machines (a hammer is a lever), and more. Did I mention it’s a chance to make noise–because hammers can make a lot of noise.
A lever is defined as any rigid bar that pivots around a fixed point, called a fulcrum, to apply force.
A claw hammer can have two possible fulcrums, depending on how it is used. When driving a nail, the fulcrum is wherever the user holds the handle. If using the hammer to pull the nail back out again, the fulcrum becomes the point where the top of the hammer rests against the surface holding the nail. Other common household levers include crowbars, hoes, scissors and bottle openers.
—www.reference.com
Here’s a quick look at things to consider when selecting hammers for children:
Size Matters
The standard 16 oz claw hammer most people picture when someone says, “imagine a hammer” is too big for your average pre-school age child–it’s both too heavy and too long. Kids will be much more successful with an 8 or 12 oz hammer. These lighter hammers also have shorter handles.
That said, having a 16 or 24 oz hammer around can come in handy if you have a very energetic child who never seems to get tired–pounding nails with a heavy hammer might do the job.

The middle hammer is a standard 16 oz hammer.
The top hammer is a 24 oz waffle faced framing hammer that’ll wear out the arm of the most energetic three-year-old.
I recommend you avoid stubby short handled hammers like the one pictured below. They are cute, but the short handle length doesn’t provide as much leverage/mechanical advantage as a standard length handle.

Material Matters
I’m a big fan of wooden hammer handles and will recommend some below, but they do require a bit more care than other handle materials. If your hammer will be put away in a dry location after each use, a wood handle is fine. If your hammer will be left out in the rain, snow, and heat, consider a hammer with a fiberglass handle. The heads on wooden handled hammers tend to loosen over time as the wood expands and contracts with moisture and this can lead to a dangerous hammer. Who want to fill out an incident report explaining that Anthony’s head wound was caused when a hammer head flew off it’s handle as Jane took a swing at a nail 10 yards away?
Color Matters
If you’re considering allowing hammers to be free range tools that children can tote around the play space as they please, you should put some thought into the hammer’s color at time of purchase–or maybe add some bright paint to the handle so it’ll be easier to locate when it’s left on the playground. Running over a abandoned hammer with a lawnmower is not good for the hammer or lawnmower.

Types Of Hammers
Let’s take a look at three types of hammers to consider for your tool collection:
Claw Hammers
If you’re going to pick one hammer style for your early learning setting, go with a claw hammer. I recommend this one for classroom woodworking–it’s the right size, it has a splash of color, and it’s fiberglass handle will stand up to harsh conditions.

Claw hammers are designed for pounding and pulling nails.
Ball-peen Hammers
Another classroom hammer style to consider is the ball-peen hammer. These hammers have two different faces–one more rounded than the other–and are used for metal work and striking punches. I don’t recommend driving nails with this style of hammer because the rounded faces are not designed for it.
I recommend this one–bright color, correct size, and fiberglass handle.

Here are some DIY ball peen hammer activities I’ve written up:
- DIY | Ball Peen Hammer And Chisel Work
- DIY | Ball Peen Hammer Punch Station
- DIY | Ball Peen Hammer Work Station
Mallets
Mallets are another style of hammer to consider. You shouldn’t drive nails with them either–it’ll mess them up pretty quickly. They are, however great for pounding wooden stakes into the ground, striking chisels, and general smashing.

These hammers would be good for things like smashing pine cones (see my post on safety gear) or pounding play dough. Such play is a good introductory activity to hammering nails.
Some Thoughts About Nails
There are lots of nails out there and at some point I might do a post about nail possibilities. For now, here’s my recommendation for the best nail-to-let-kids-pound-into-a-hunk-of-wood: 1 1/4 inch Galvanized Roofing Nail.
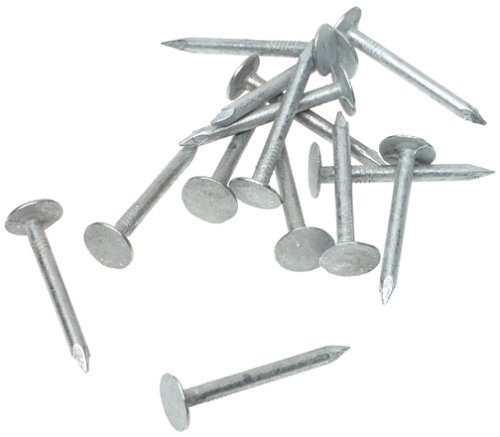
These nails are inexpensive, rust resistant, and have big heads that make great targets for hammer novices.
Hammer Care
A couple hammer care tips:
- Try to keep them dry and dry them if they get wet.
- Wipe them with a clean dry rag from time to time.
- Wipe metal parts with a light coat of oil (WD40, mineral oil, linseed oil) a couple times a year.
- Check hammer heads a couple times a year to assure they are not becoming loose.
- Check wooden parts for splintering or splitting.
- Wipe wooden parts with a light coat of mineral oil or linseed oil a couple times a year.
Conclusion
Hammer time can be full of learning and fun (and NOISE) and it’ll be more successful if you’ve put some thought into your hammer selection. I’d love to see your hammer thoughts and questions in the comments.
Contribute content to Playvolution HQ
Brought to you by Explorations Early Learning
Browse Trainings


Post Author

Jeff Johnson is an early learning trainer, podcaster, and author who founded Explorations Early Learning, Playvolution HQ, and Play Haven.
Leave a Reply