Overview
Many children will delight in both making mud blocks and mud block play. What’s not to like about combining mud play and block play?

These blocks are not indestructible, but that should be seen as a feature, not a bug. I’ve found that a four-year-old with her mind set to destruction is a very powerful force. The fact that these blocks are so inexpensive and simple to make is a plus if you work with children who have a need to destroy stuff. Busting up mud blocks can be a great outlet for a child’s destructive energy (and direct that energy away from other people and objects). The process of creating these blocks, destroying them, and then using the materials to make new blocks is also full of learning opportunities.
Before diving into the mud block making process, let’s take a quick look at how durable they are. Here’s a block dropped from a height of about five feet. I dropped it about a dozen times, and the only damage effect was that the rough corners were rounded a little.

Here’s another mud block after I exposed it to back-to-back thunderstorms that resulted in over six inches of rain. It eroded a bit, but after leaving it untouched for a few days to dry it was ready for play.

Durability depends a lot on the available soil used to make the blocks, so results will vary.
Supplies
To make mud blocks, you’ll need:
Process
Let’s get to the do-it-yourselfing…
Build Some Molds
To get started, you’ll need to build some block molds. I sliced scrap lumber and nailed it together into rectangles as pictured below. I made multiple sizes–all were about 2.5 inches tall and ranged in size from about 3 x 3 inches (ca. 8 cm) to 3 x 7 inches (ca. 18 cm).


Alternatively, you can use plastic containers (butter, yogurt, etc.) or metal containers ( muffin tin, bread loaf pan, etc.).
Mix Some Mud
Mud will vary from location to location based on the available soil, but the mud mixing process will be the same: mix soil and water. Aim for a mud mixture with the consistency of cottage cheese or oatmeal. Too soggy and it’ll take a long time to dry. Too thick and it will be difficult to pack into the molds.


Pack The Molds
Now it’s time to form your blocks. Just smoosh the mud into the molds, doing your best to smooth the top surface. Do this on a flat surface in a location where the molds can be left to dry. A covered location is preferable because a hard rain will turn your drying blocks to mud soup.

Let Them Dry A Bit
Now for the hard part–waiting. While you could sit and watch the mud dry for the next 12-24 hours, you can probably think of more interesting things to do.


Remove The Frames
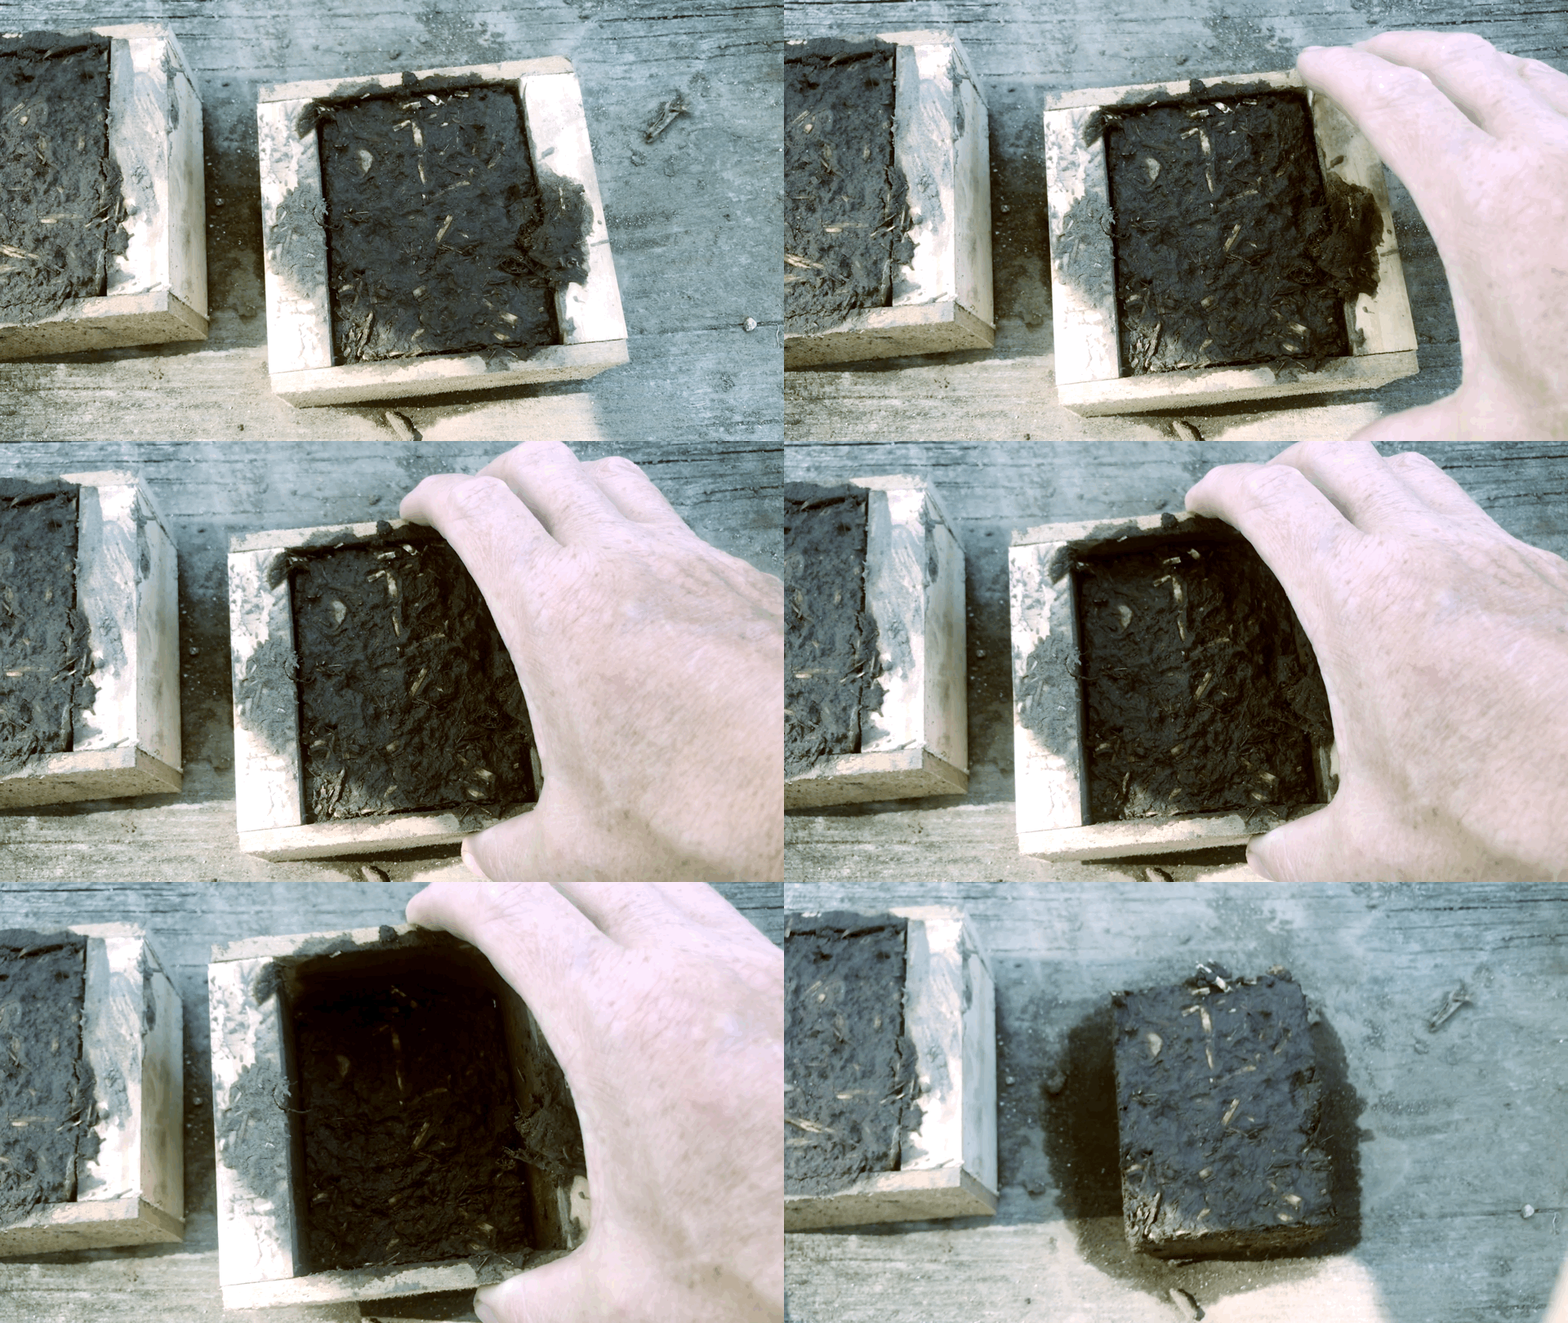
After 12-24 hours, you’ll notice that the mud block has shrunk a bit as it has begun to dry, as seen in the below image.

The mold should slip off easily, but you may need to hold the block in place with one hand and slip off the mold with the other. If the block sticks to the mold, walk away and go back to waiting.

If you’re using plastic containers or muffin tins as mud block molds, the remove-the-mold process is a little different. Just invert the container and give it a good wack with the back of your hand. The block will slip out if it is dry enough. If not–wait.

Removing the frames frees them up for making another batch of blocks, It also allows air to circulate around the blocks you’ve created so they dry quicker.
Let Them Dry Some More
After removing the molds, set the semi-dry mud bricks aside for more drying. Select a partly sunny location. A partly sunny location with a nice breeze is even better. A partly sunny location with a pleasant breeze and protection from rain is the best.
Stack them for drying so that air can circulate (see image below).

Let them dry until they are dry. How long that takes will depend on your mud and your weather. My mud blocks seemed to need 3-4 days to thoroughly dry.
Time For Play
Once your blocks are dry, it’s time for play.
Use them on their own or let them play with other materials. Mud blocks play well with sand, sticks, the DIY concrete blocks I wrote about here, and lots of loose parts.
Some other play ideas:
- Mix up a fresh batch of mud and use it for mortar to build mud walls.
- Add mud blocks to water play. The blocks will be destroyed, but it’ll be a STEM play experience, and you can make more mud blocks.
- Mud blocks work well for supporting ramps and as props in dramatic play.
Conclusion
If you’re looking for a fresh hands on play idea, you could do a lot worse than making and playing with mud blocks. If you give this DIY project a try, I’d love to hear how it goes in the comments below. That’s also the best place to ask any questions you have about the process.
Brought to you by Explorations Early Learning
Contribute content to Playvolution HQ
Contribute content to Playvolution HQ
Brought to you by Explorations Early Learning
Browse Trainings
Post Author
Jeff Johnson is an early learning trainer, podcaster, and author who founded Explorations Early Learning, Playvolution HQ, and Play Haven.


Leave a Reply