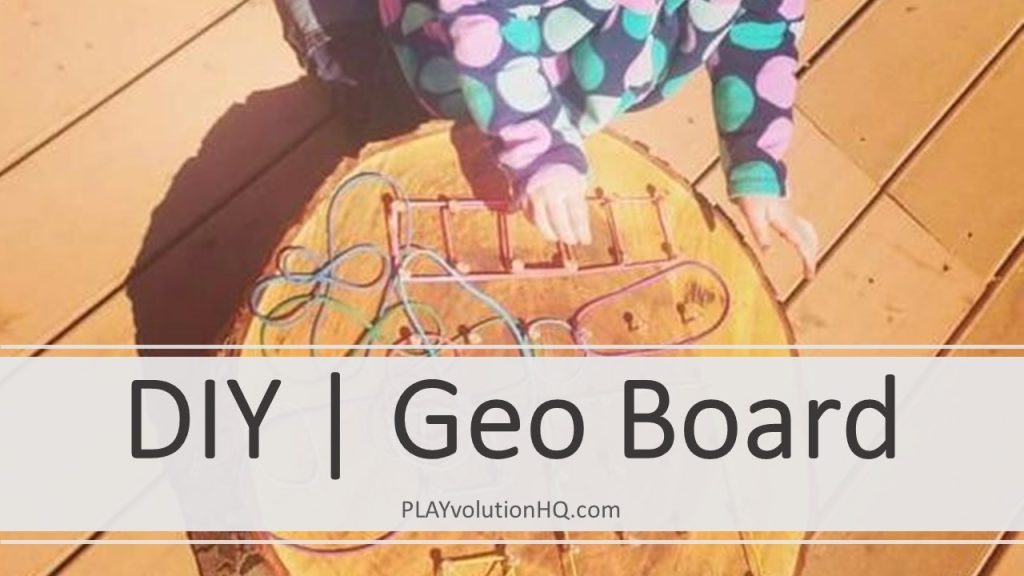
This log slice Geo Board is a fun way for kids to play with shapes. The play alone is inherently valuable, but, for those who are wondering, such play is also learning rich.
Playing with a geo board like this can support the development of hand-eye coordination, small muscle strength, color recognition skills, a deeper understanding of cause-and-effect relationships, pre-math skills, pre-writing skills, pre-reading skills, and more.
This is a pretty straight forward project. We’ll start out with lists of necessary tools and supplies and then move into the step-by-step instructions.
Supplies:
-
Log slice–4-8 inches thick and at least 15 inches (ca. 38 cm) across
-
Roofing nails (1.5 inch (ca. 4 cm) long)–copper nails are best, stainless steel are great too, galvanized are good, zinc coated are OK.
-
Rubber bands–we prefer these.
Tools:
-
Sandpaper or an electric sander
-
Pencil/pen/marker
-
Tape Measure
-
Disposable plastic container with a wide mouth
-
Rags

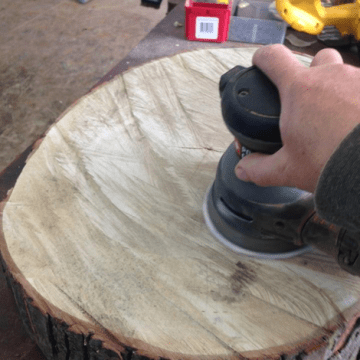
Smooth It Off
Start out by giving the face of your log slice a light sanding. The goal is not to get it perfectly smooth, you just want to knock off any rough edges and smooth the surface a bit. Most log slices of this size will have noticeable chainsaw marks, and that OK–they add to the rustic aesthetic of the piece.
Oil It Up
Next, apply a liberal coat of linseed oil. First dump some oil into a disposable plastic container (think whipped or sour cream container). Then just dip your rag and wipe the oil onto the face of the log. Alternatively, you can just dump some oil onto the surface and smear it on. It’s a bit more messy, but it gets the job done. Allow the oil to soak in for about 30 minutes and then wipe off any excess with a fresh rag.
Now, flip the log and repeat the process on the other side.
The purpose of the oil is to protect the log slice from moisture. It does not make the wood waterproof, but it does make it water-resistant. It also highlights the wood’s grain.
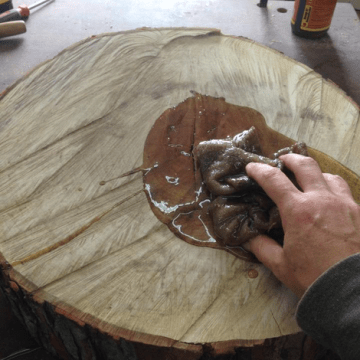
One coat of oil is OK, but for more protection it’d be a good idea to add 2 or 3 coats. Just repeat the above process a few more times, allowing a few hours between coats, if you want the added protection. After you’ve done all the oiling you plan to do, allow the oil to cure a bit by letting the log slice sit overnight before proceeding to the next step.
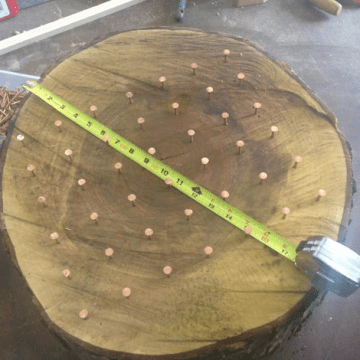
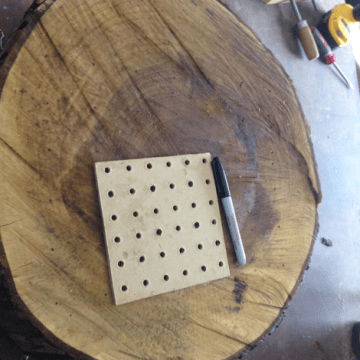
Lay It Out
Using your writing utensil and tape measure, mark out a grid on the face of the log slice. Do your best to space the dots evenly in both directions. Ideally, you will have the same amount of dots horizontally as you do vertically. I prefer to space my dots 2 inches (ca. 5 cm) apart, but you can space them closer if you like. The size of your grid will depend on the size of your log slice.
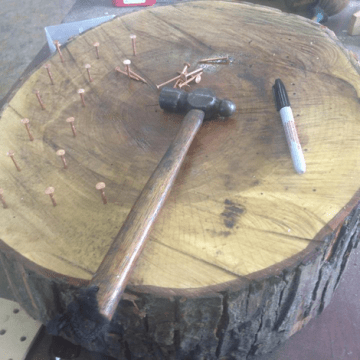
Hammer It Hard
It’s Hammer Time. You don’t have to rock out with MC Hammer during this step, but it’ll be more fun if you do. Just hammer a nail into each of your grid’s dots. Leave about 0.75 inches (ca. 2 cm) of each nail exposed.
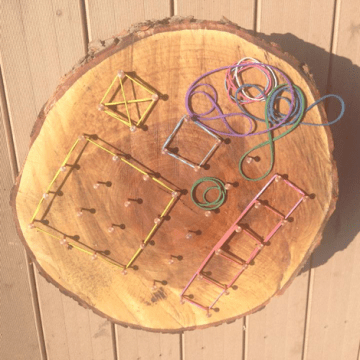
Let It Play
You’re done! Now just plop it in front of some kids with a pile of rubber bands and watch the play.
Notes
-
Make sure your log slice has had time to dry before you start this process. If your log slice is too fresh, you’ll be sealing in moisture with the oil instead of keeping it out.
-
Be mindful with the rubber bands. They are a choking hazard. Some kids love to chew on stuff.
-
This is a project kids can help build–might as well have some help, so you don’t have to do all the work!
-
The log might split. A well-dried slice of wood with plenty of protective oil may still develop a split (think Pack Man) as the wood continues to dry or it’s moisture content changes. Don’t fret. Such splits rarely threaten the life of a geo board. A crack may exist but the slice as a whole will still be stable and usable.
-
Best practice would be to reapply oil a couple of times a year–especially if the geo board lives outside.
-
Don’t want to build your own geo board?
Please share questions, comments, or pictures of your geo board ideas in the comments below.
Contribute content to Playvolution HQ
Brought to you by Explorations Early Learning
Browse Trainings


Post Author
Jeff Johnson is an early learning trainer, podcaster, and author who founded Explorations Early Learning, Playvolution HQ, and Play Haven.
Leave a Reply