Revised | Originally Published: July 3, 2021 @ 3:03 pm
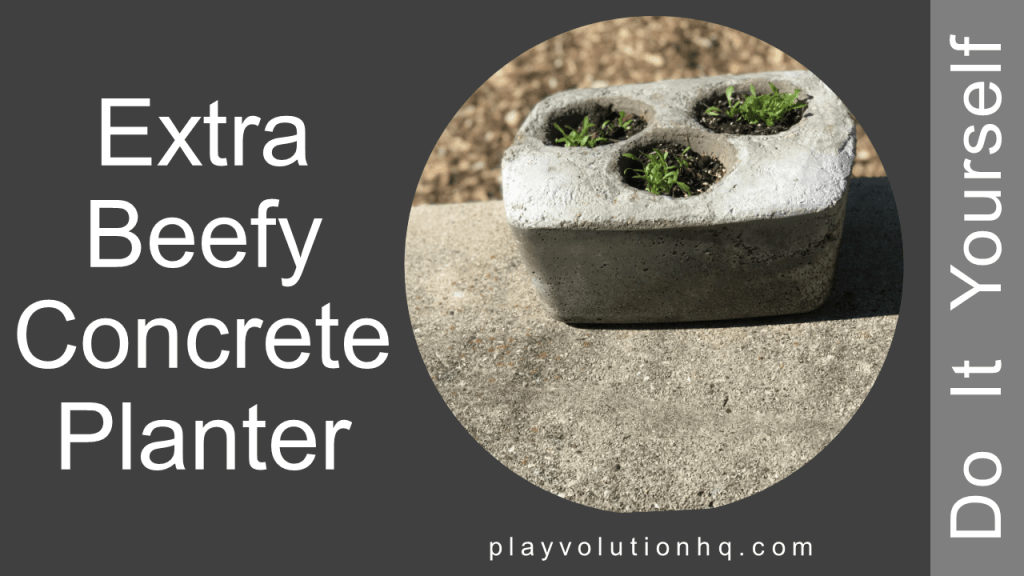
Concrete Planter Overview
Here’s a do-it-yourself project based on my first attempt at making concrete planters. I decided to try this project after making ice cube glasses and bowls for another project about a year ago. The process is the same, except this project uses cement mix instead of water.
If you’re into gardening and planting things with children, this project will be a fun addition to what you’re already doing. Creating a Big Heavy Thing for plants to live in out of some grey powder and a bit of water is almost magical to a three-year-old. But the process is not magic; it’s a chance to play with STEM concepts.
Supplies
To build a concrete planter, you’ll need:
- A large container (I used a plastic tote)
- One or more smaller containers (I used cottage cheese containers)
- Cooking oil
- Cement mix
- Water
- A container for mixing the cement
- A trowel for mixing the cement (no trowel? A beefy stick or hunk of wood will work)
- A utility knife or something similar
- A drill and 1/2 inch concrete bit
- Maybe a flat-head screwdriver
The Concrete Planter Process
The basic process is to put concrete in a bigger container, form it around one or more smaller containers, let it dry, and then remove the containers.
A Bit About Containers
Before mixing up any cement, think about the containers you’re using and how you’ll arrange them.
Avoid creating sides for your planters that are too thin. Too-thin planter walls lead to a weak and breakable planter.
You also want to avoid containers with shapes that’ll make them hard to remove. Straight or slightly tapered sides are cool. A container with lots of contours is a challenge.
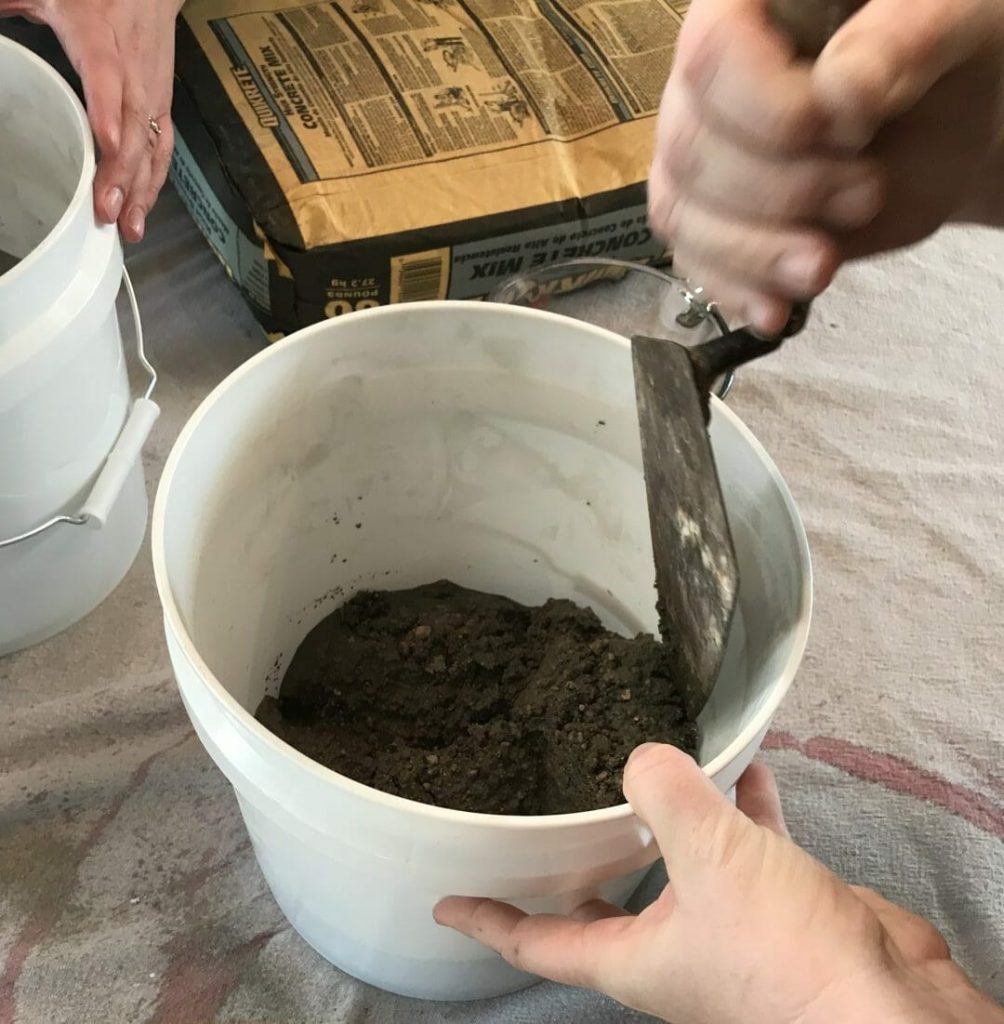
Mix It Up
Mix up some concrete according to the instructions on the bag. You want a firm-ish mix. Don’t make it too soupy.
Lube Them Up
Cover the inside of your large container and the outside of your small container(s) with cooking oil. The oil acts as a lubricant, making the containers easier to remove when the cement cures.
Put It All Together
Start by adding some concrete to the larger container. Smoosh it in there so it covers the bottom of the container well. Create a base of about an inch of concrete so your planter will have a strong bottom.
Now, position your smaller container(s) and fill the voids with cement mix. Smoosh it in there good–you want to avoid voids.
Smooth and shape the top surface so that water will run off.
If you need to add initials or a date to the surface, let the mix set up for an hour or so, and then do your decorating with a stick or something similar.

Set The Concrete Planter Aside
Set the container aside for a day or two. A cool dark location is better than a hot bright one.
Remove The Containers
After a day or two, you can remove the containers. It might take some muscle. You might need to slip the end of a screwdriver between the edge of the container and the concrete. You might need to slice the container away in pieces with a utility knife.
Work gloves might be helpful too. Concrete can be rough on the fingertips and knuckles.

Concrete doesn’t dry. It cures through a process called hydration. This process can take months and months, but you need to concern yourself with the first couple of weeks. To help the curing process, wet your creation down after it’s freed from the container and every day for the next week or two. Just pour water on the surface and let it soak in. The result will be a stronger planter.
During this time, you can have a refreshing beverage and enjoy life–don’t just sit and watch the concrete cure.
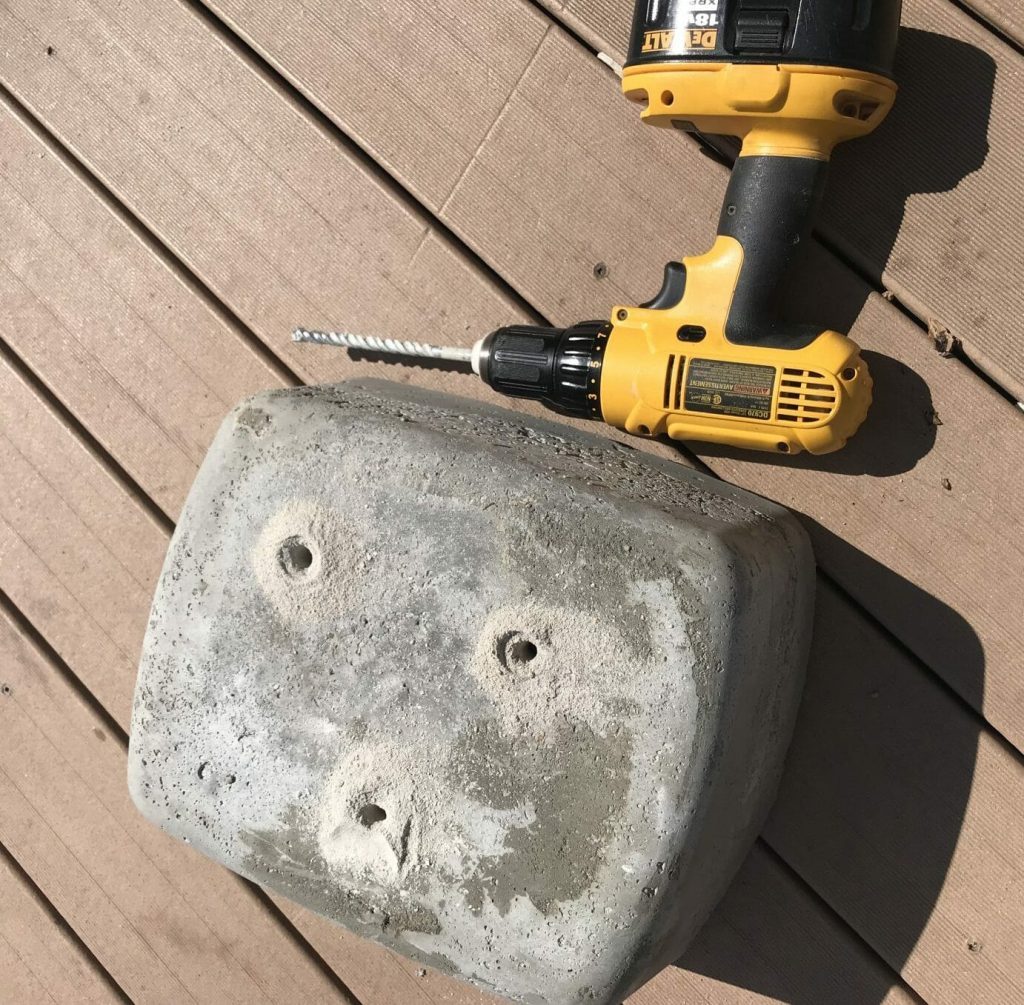
Drill Some Drainage In Your Concrete Planter
Once your planter is freed from the bonds of the containers, take a moment to do a Happy Dance and celebrate your creation.
Then, flip it over and drill some drainage holes–one hole for each smaller container you used.
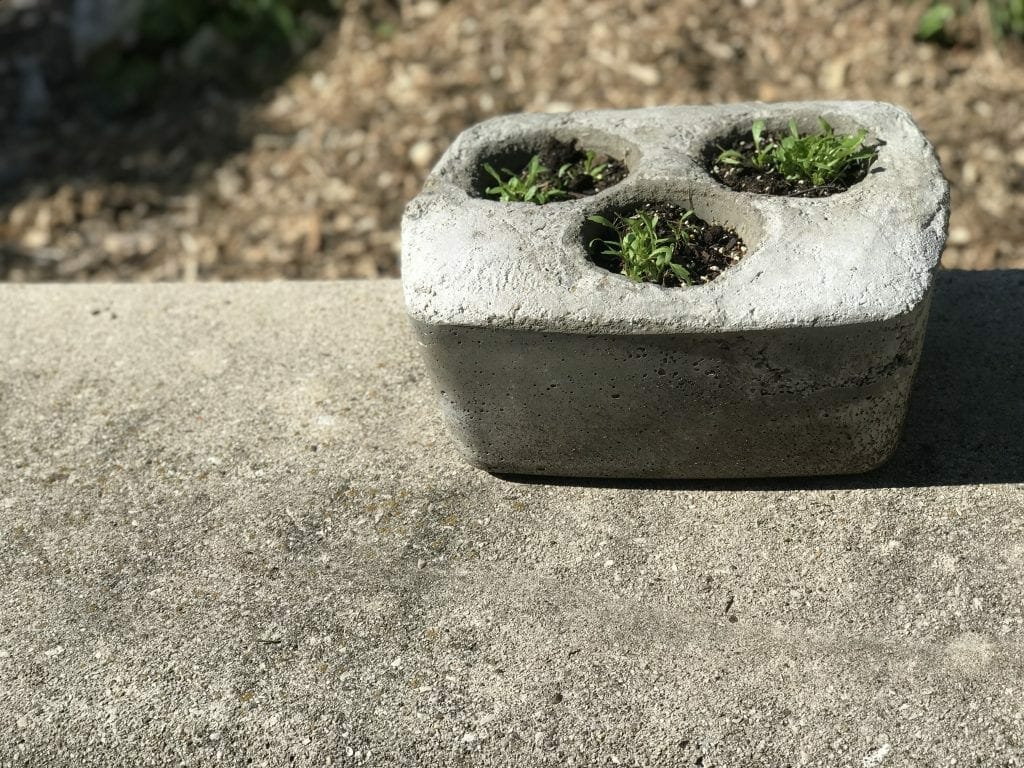
Add Plants
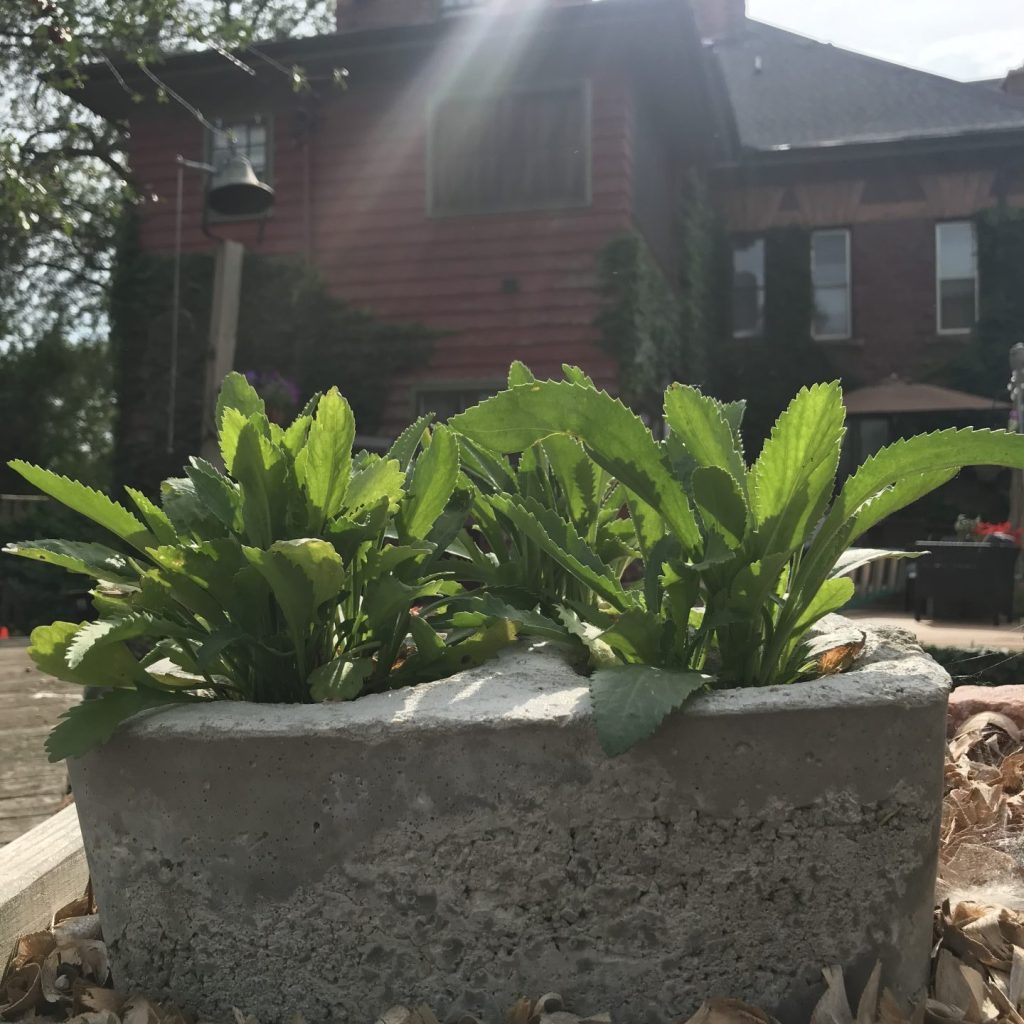
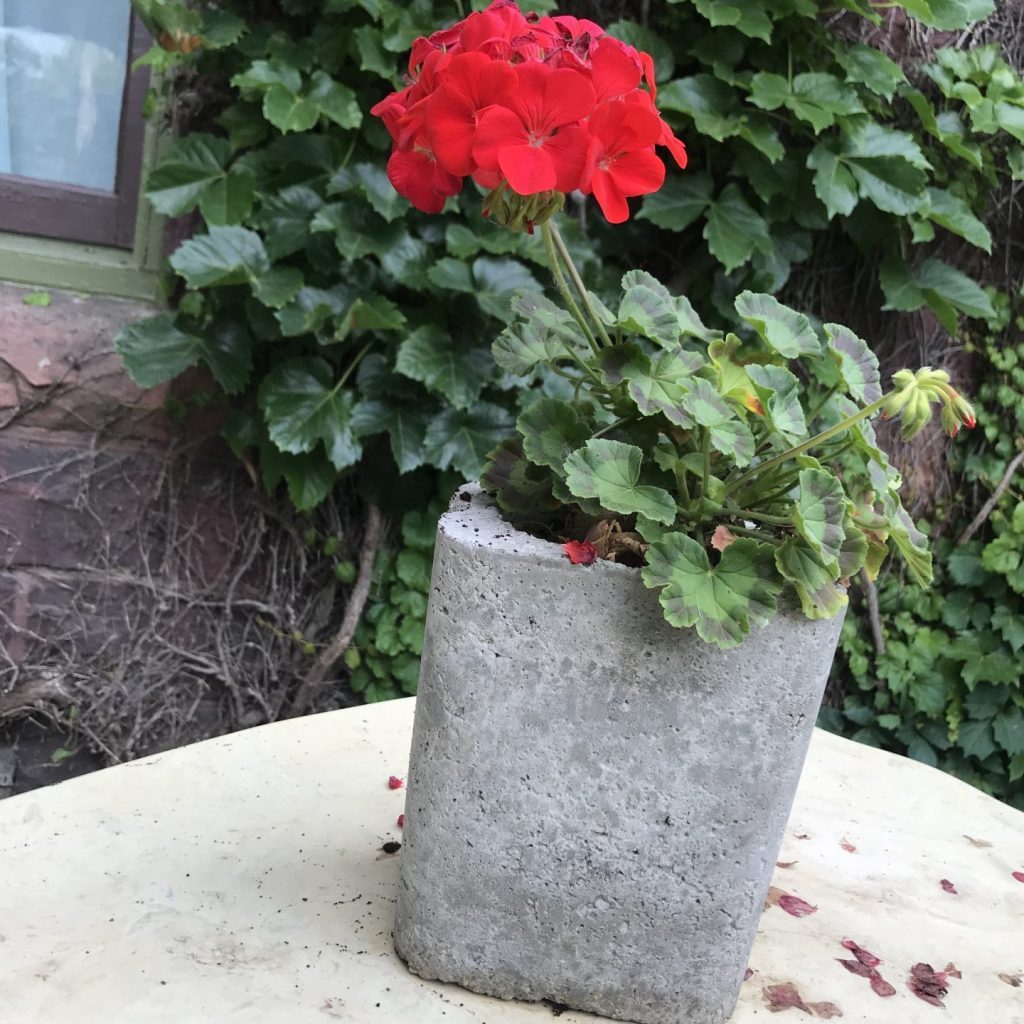
Now that your concrete planter is done, add some soil and plants, and you’re good to go.

Conclusion
This project was fun, and I plan to make more concrete planters. I’ll update this post with more photos of new creations and updates on how the plants do in them. If you try this, I’d love to see pictures and hear about your experiences in the comments. You might also be interested in the DIY Concrete Blocks project.
Update
07/01/2019 Here are a couple of photos showing how the plants have filled out this summer:
Contribute content to Playvolution HQ
Brought to you by Explorations Early Learning
Browse Trainings


Post Author

Jeff Johnson is an early learning trainer, podcaster, and author who founded Explorations Early Learning, Playvolution HQ, and Play Haven.
Leave a Reply