Revised | Originally Published: July 3, 2021 @ 3:57 pm
Overview
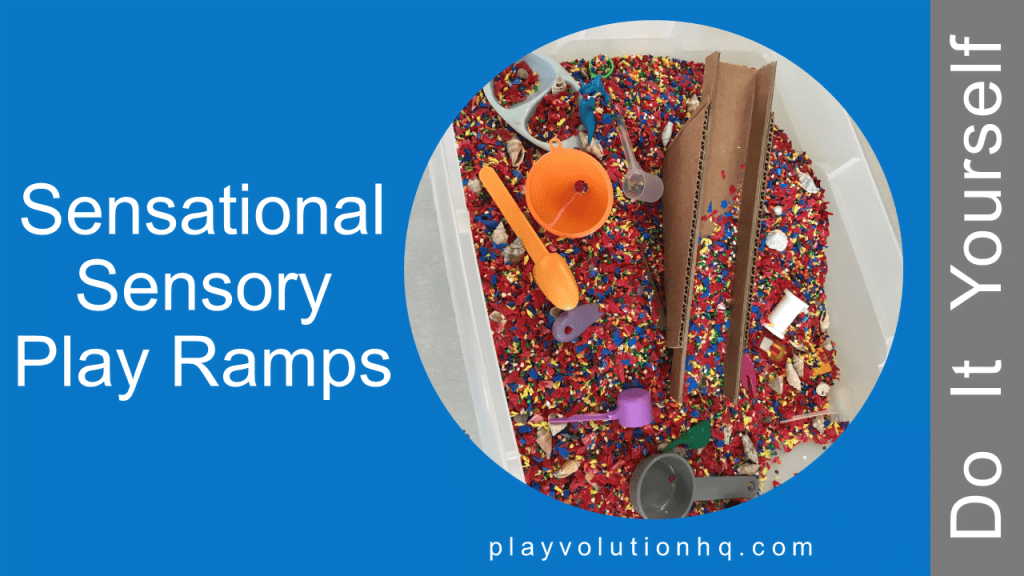
Here are do-it-yourself instructions for building sensory play ramps. The original plan was to construct a small stand-alone ramp that’d fit nicely into a sensory play bin, but it could also be used outside the container with small cars, balls, thread spools, and other ramp-friendly toys.
Here’s a few seconds of video so you can see the ramp in action:
Supplies For Building Sensory Play Ramps
You’ll need the following:
- Cardboard
- Ruler Or Yardstick
- Utility Knife
- Pen
- Hot Glue Gun
Process
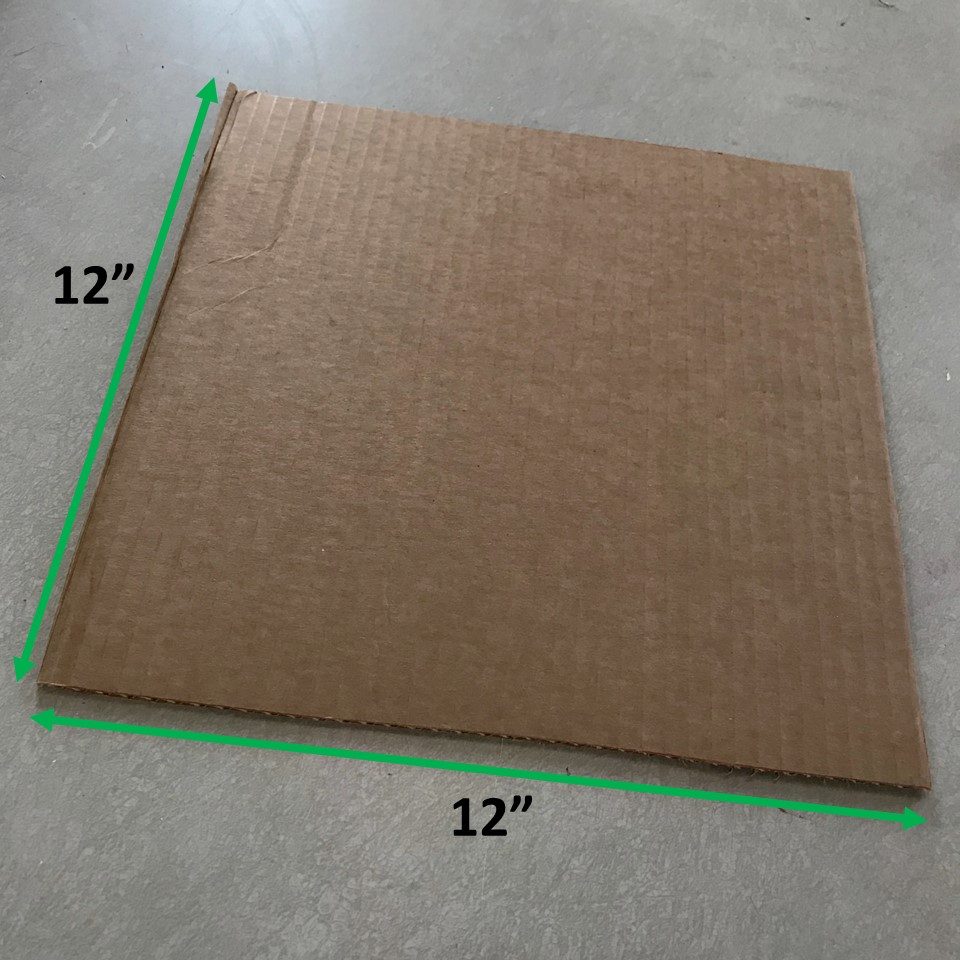
Start with a 12-inch square piece of corrugated cardboard.
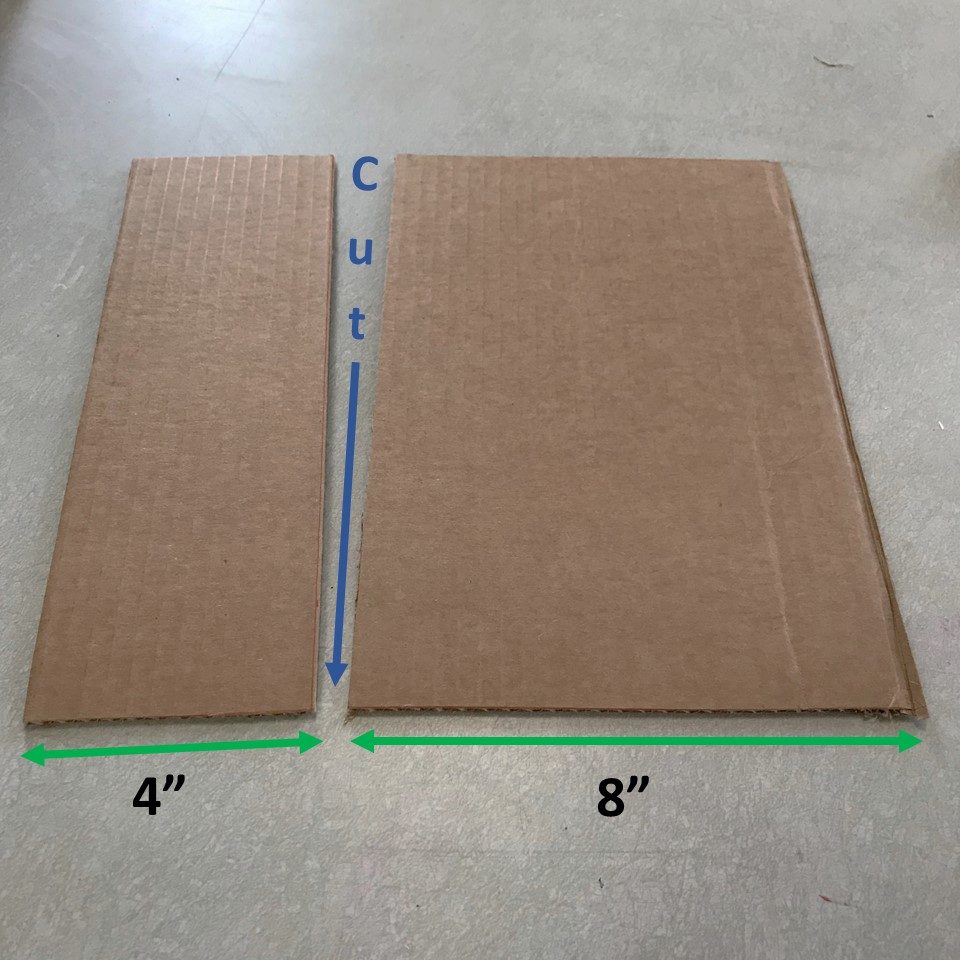
Cut that piece into a 12-inch by 4-inch piece and a 12-inch by 8-inch piece.
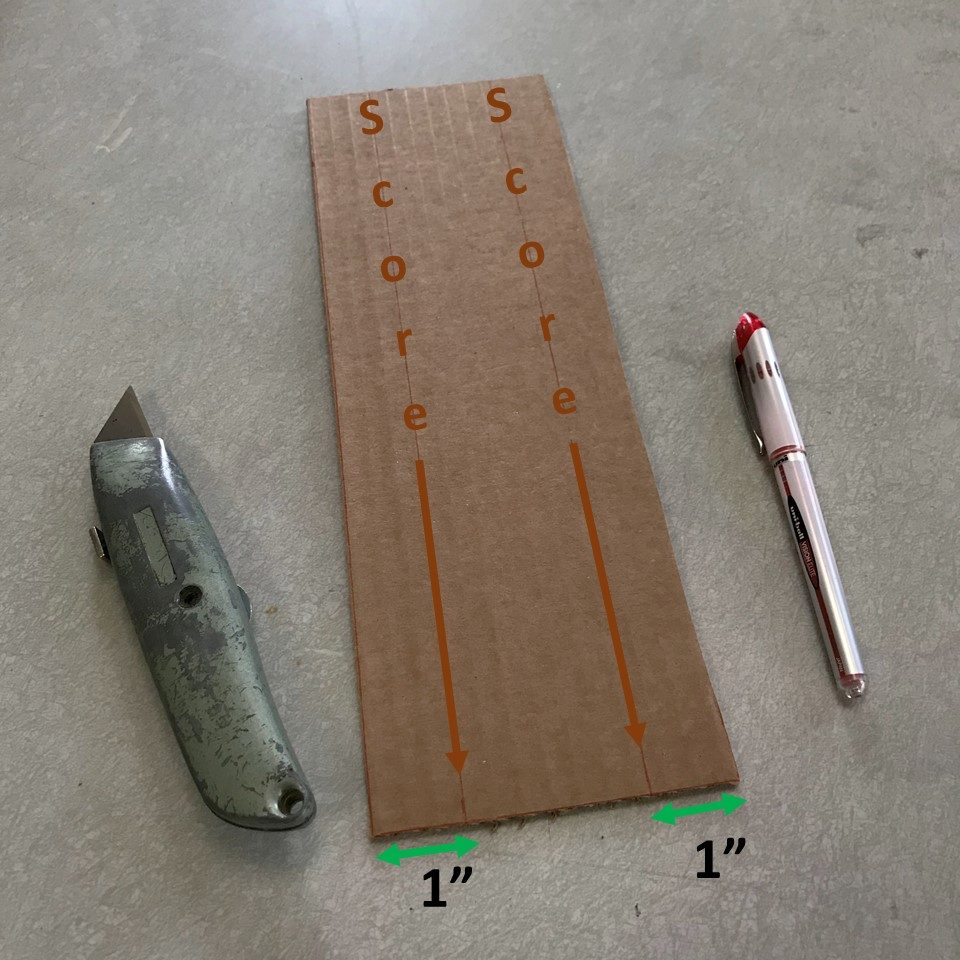
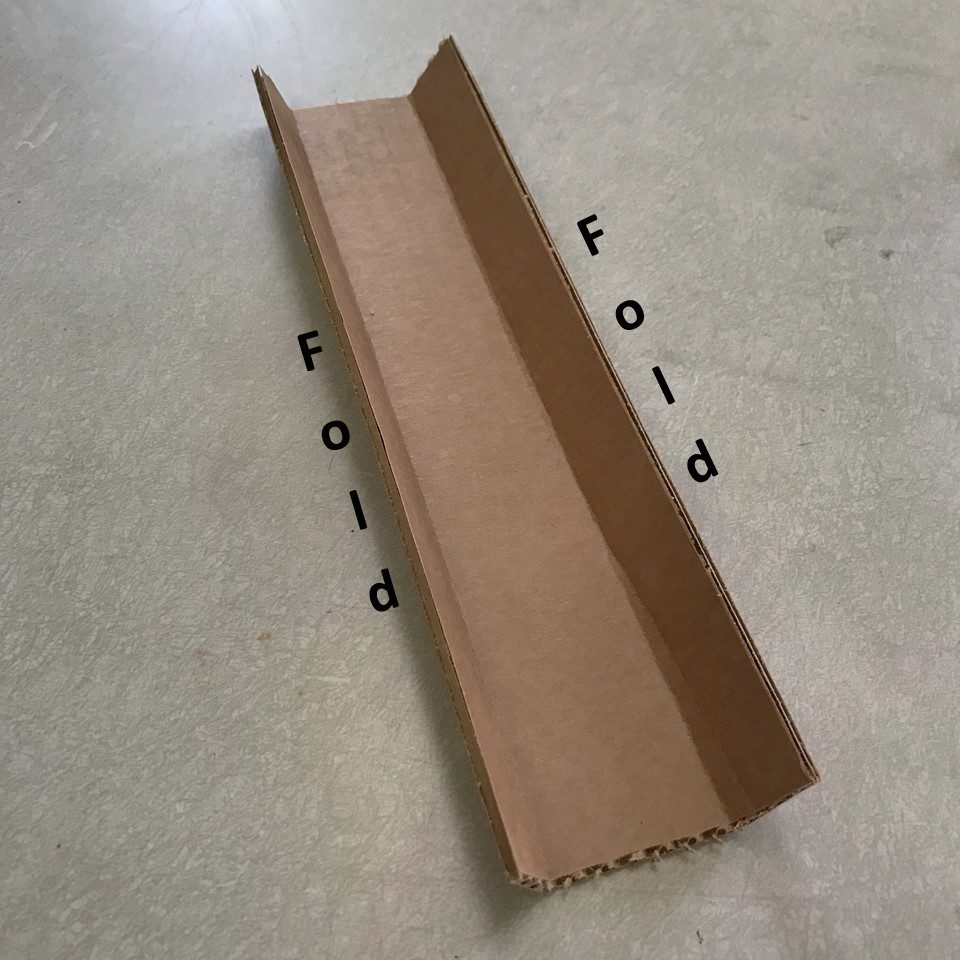
Score lines one inch in on the long sides of the 12-inch by 4-inch piece. The score should slice about halfway through the cardboard. This piece will become the ramp.
Now, flip the cardboard over and fold the long edges of the piece along the score lines to create the ramp sides.
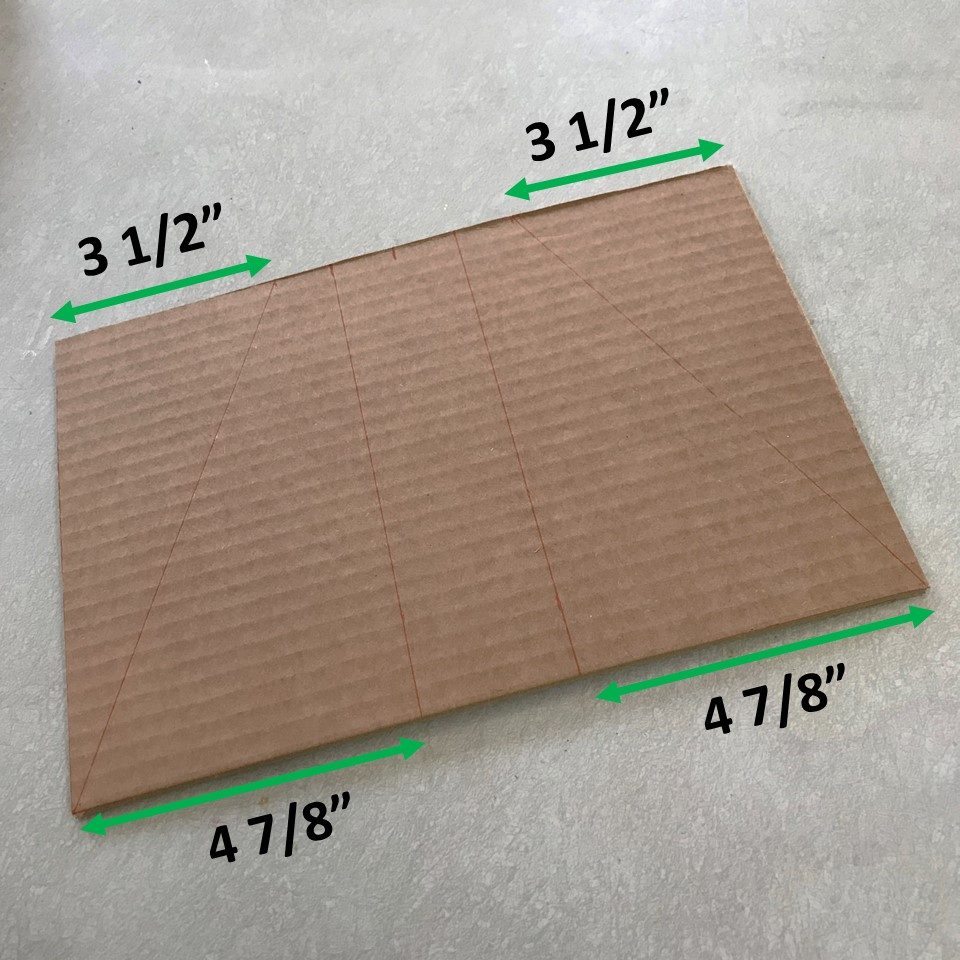
Next, set aside the ramp and lay out the base. Start by measuring 4 7/8 inches from each end along the cardboard’s long side and draw lines parallel to the cardboard’s short sides. After that, measure 3 1/2 inches from each end along the cardboard’s long side and draw a diagonal line to the opposite side. Check the photo below to see how your layout should look.
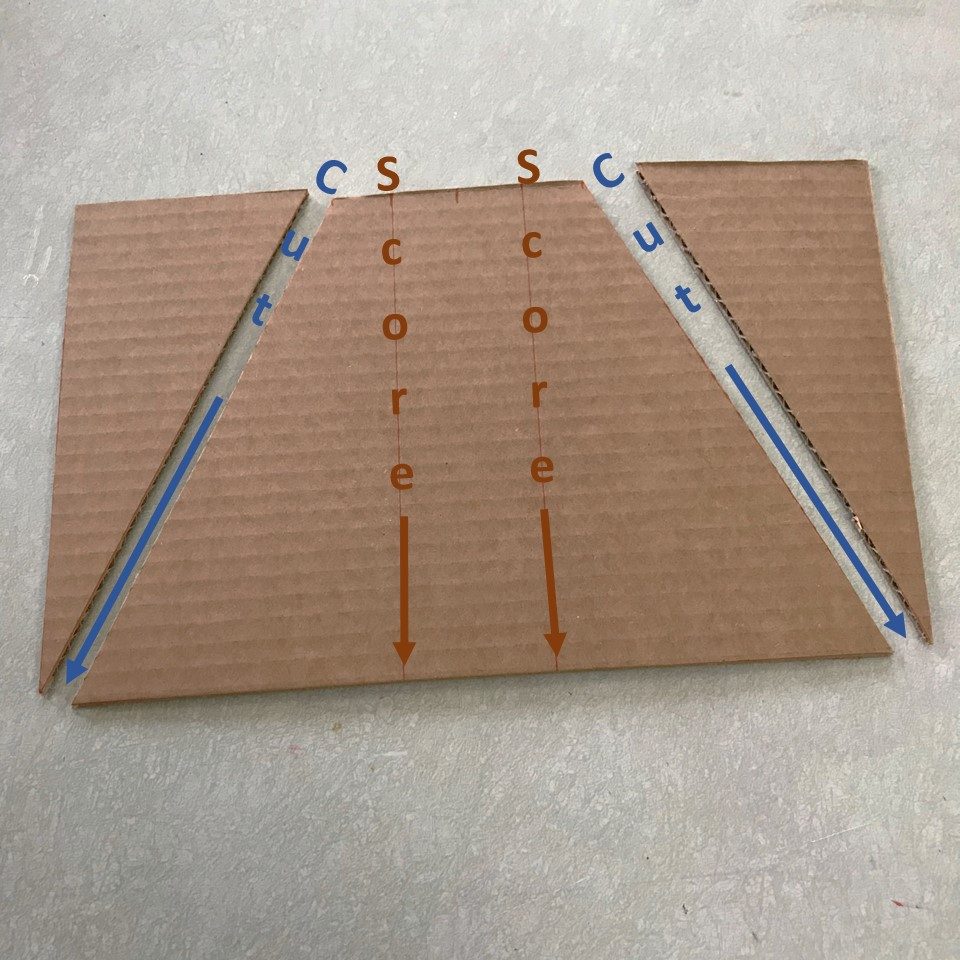
Time to cut out the base. First, cut along the diagonal lines and discard the triangles. Then, score along the remaining lines.
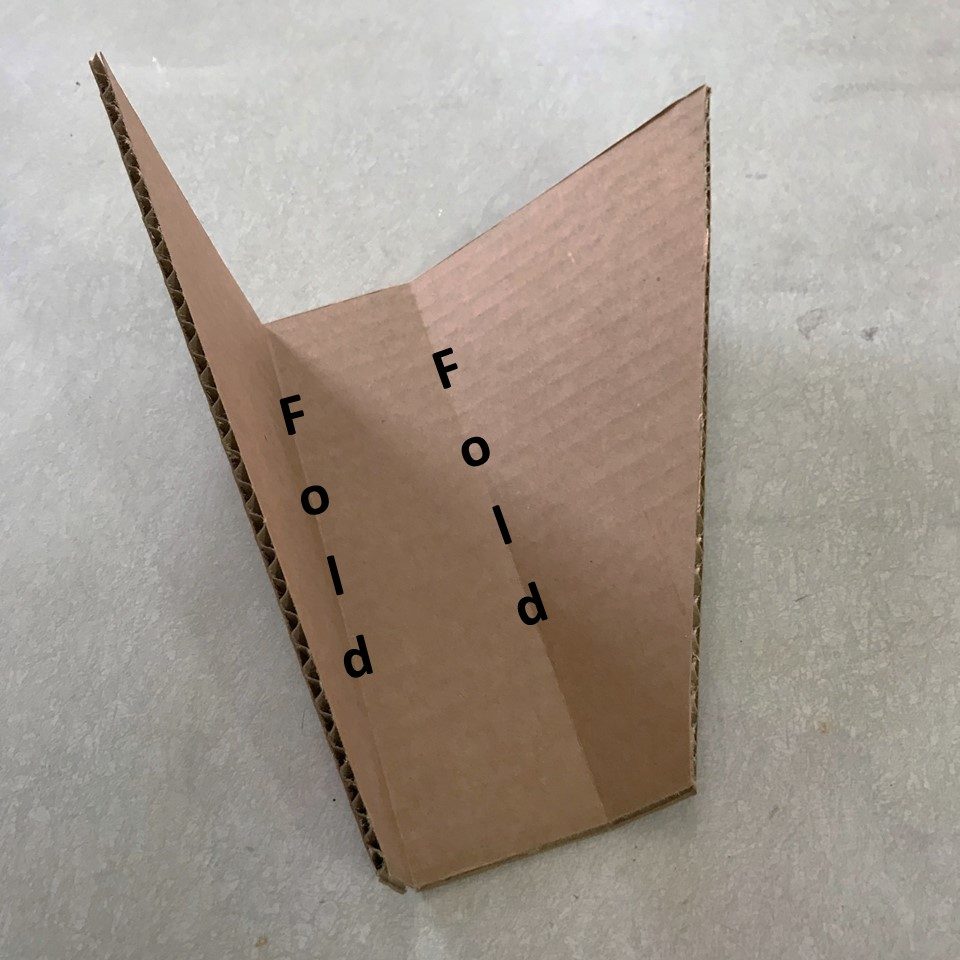
To form the base, flip the cardboard over and fold it along the score lines.
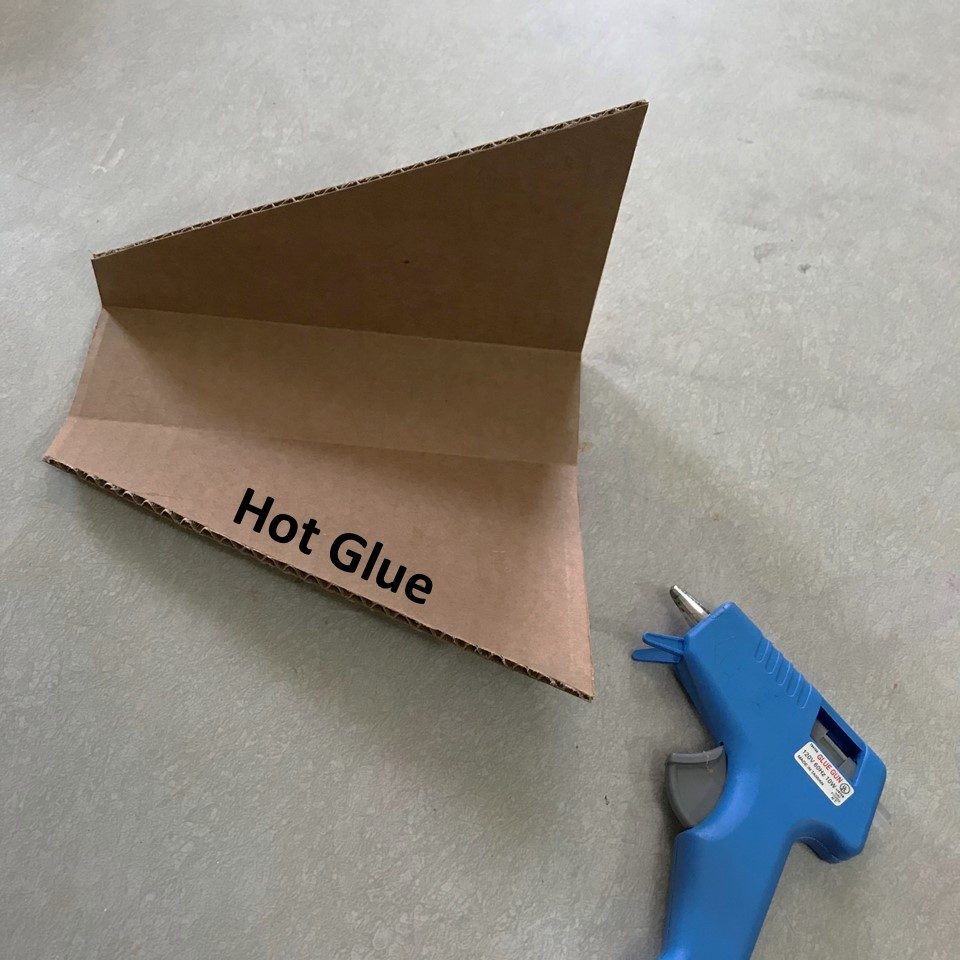
Put it all together by applying a line of hot glue along one edge of the base, as shown in the illustration below, and then attaching one outside edge of the ramp.
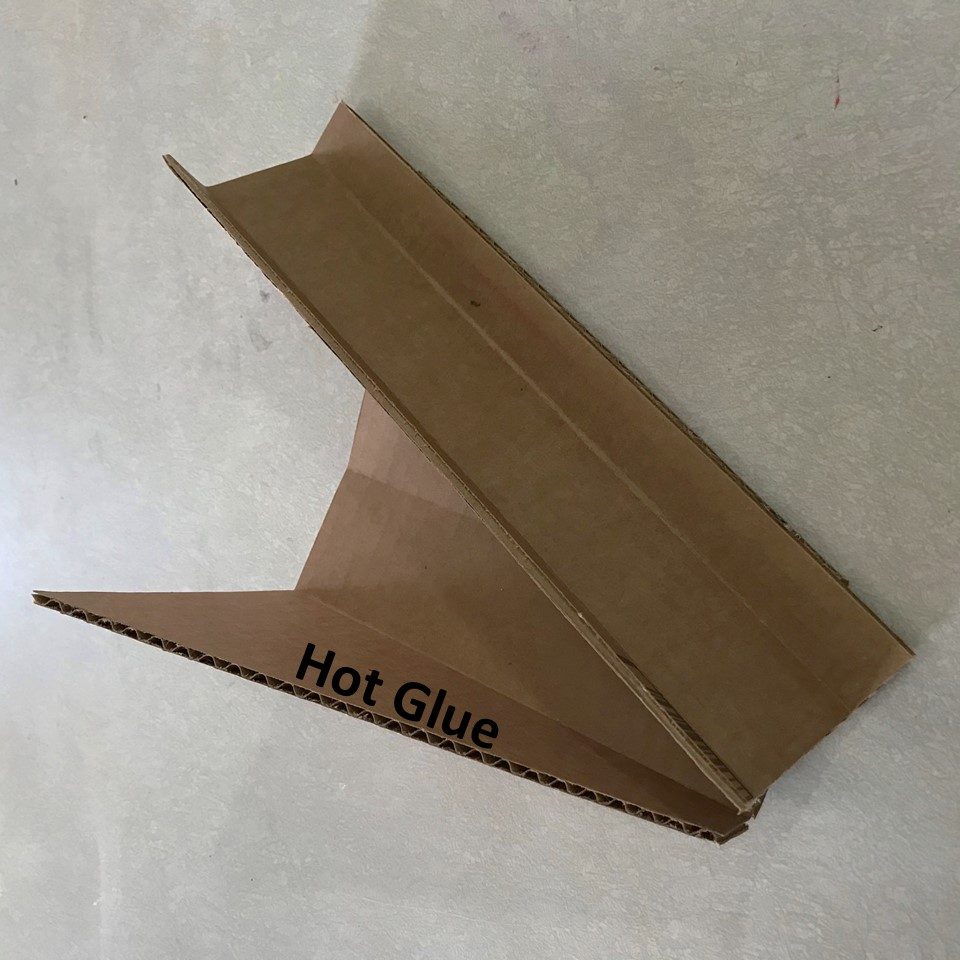
After letting the glue set up for a few moments, apply glue to the other base edge and attach it to the ramp side, as seen below.
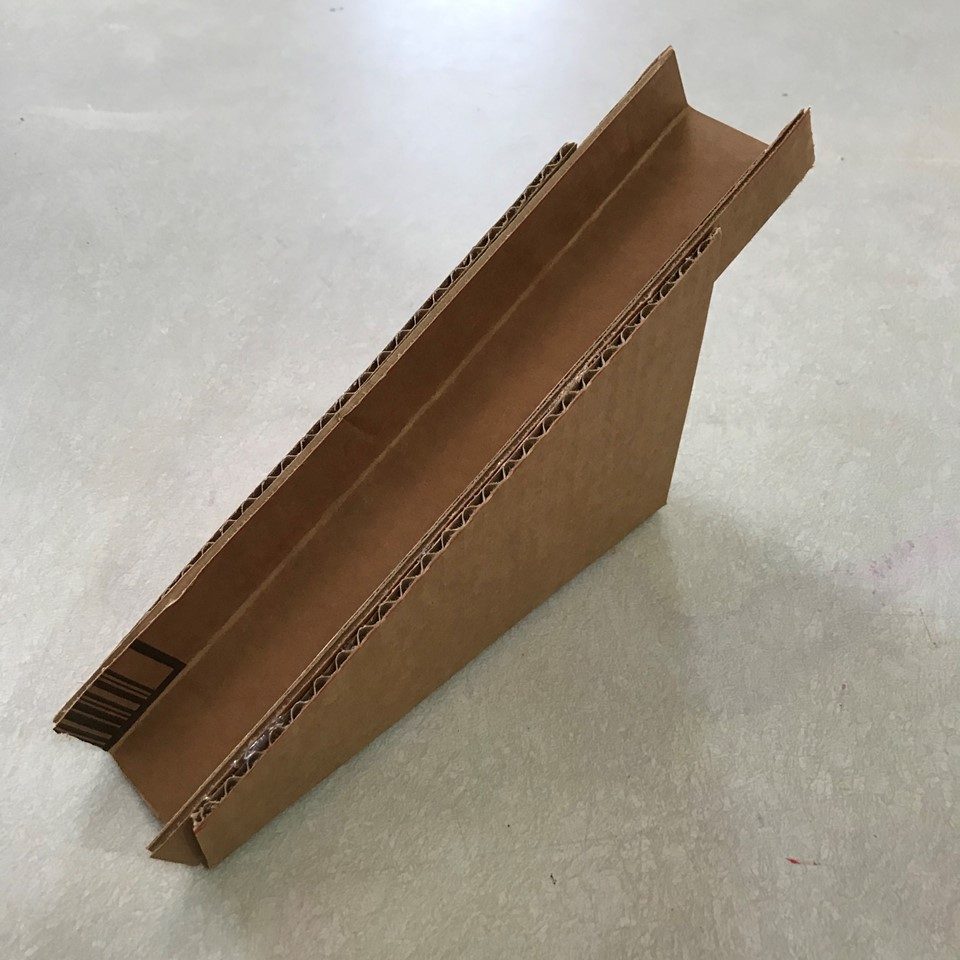
Let the glue dry, stand up the ramp, and get to ramping.
Sensory Play Ramps Wrap Up
Once you’ve made a couple of sensory play ramps, you can play around with design variations. For example, to change the ramp’s slope, adjust the angle of the ramp base by measuring in a bit less–2 1/2 or 3 inches instead of 3.5.
Making sensory play ramps with kids provides a chance for them to hone a variety of skills. After making a few on your own to get comfortable with the process, create more with kids’ help. DIY projects like this are rich in opportunities for STEM and other learning. Check out this post for more reasons to DIY with kids.
As always, your thoughts, comments, questions, and photos of your sensory play ramps are welcome in the comments.
Contribute content to Playvolution HQ
Brought to you by Explorations Early Learning
Browse Trainings


Post Author

Jeff Johnson is an early learning trainer, podcaster, and author who founded Explorations Early Learning, Playvolution HQ, and Play Haven.
Leave a Reply