Table of Contents
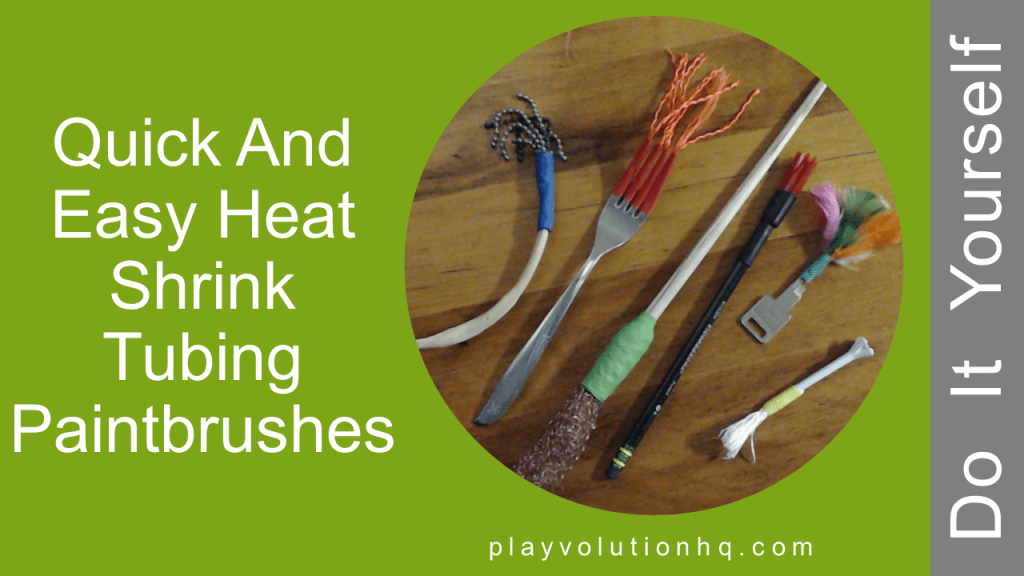
Heat shrink tubing makes DIY paintbrush creation quick and easy. Making custom paintbrushes using everyday items with kids adds variety to your art area and offers a chance for some STEM play and exploration.
Heat Shrink Tubing Paintbrushes Video
Here’s a quick video explaining the process:
Why Heat Shrink Tubing?
The main reason to use heat shrink tubing to make DIY paintbrushes is that it is more durable than masking tape and duct tape for brushes that will be repeatedly submerged in paint, washed, and dried. It’s also a novel material that can spark some STEM learning. It can also be easier in some applications–like the fork paint brush pictured below. Plus, it’s fun.
You can support Playvolution HQ by shopping Amazon via this link for your heat shrink tubing or this link for any other items (affiliate links). You don’t pay any extra, and I get a few cents to help create posts like this.
Some Examples
I put together half a dozen brushes with odds and ends lying around the studio.
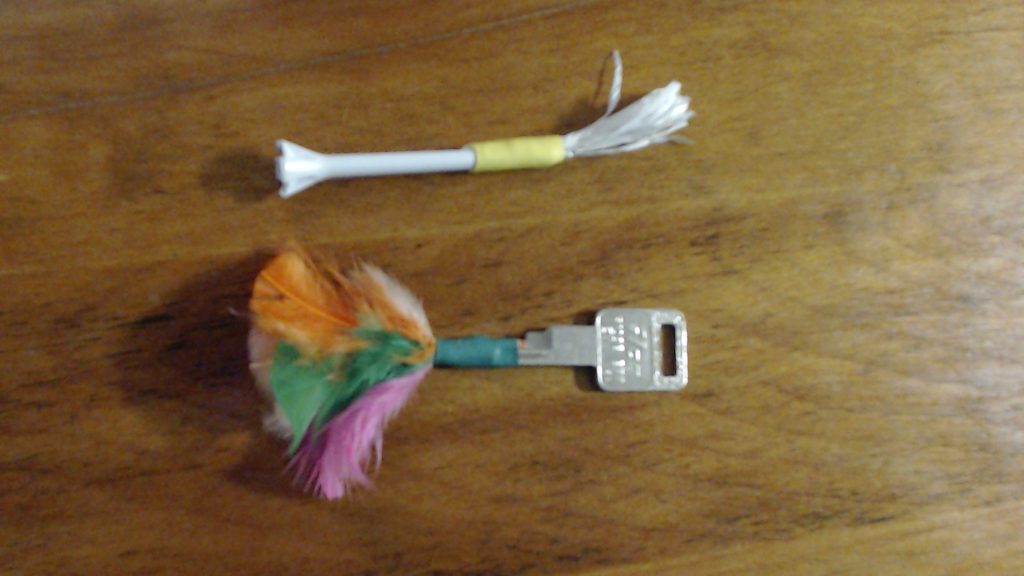
First, a golf tee and dental floss brush next to a key and feather brush.
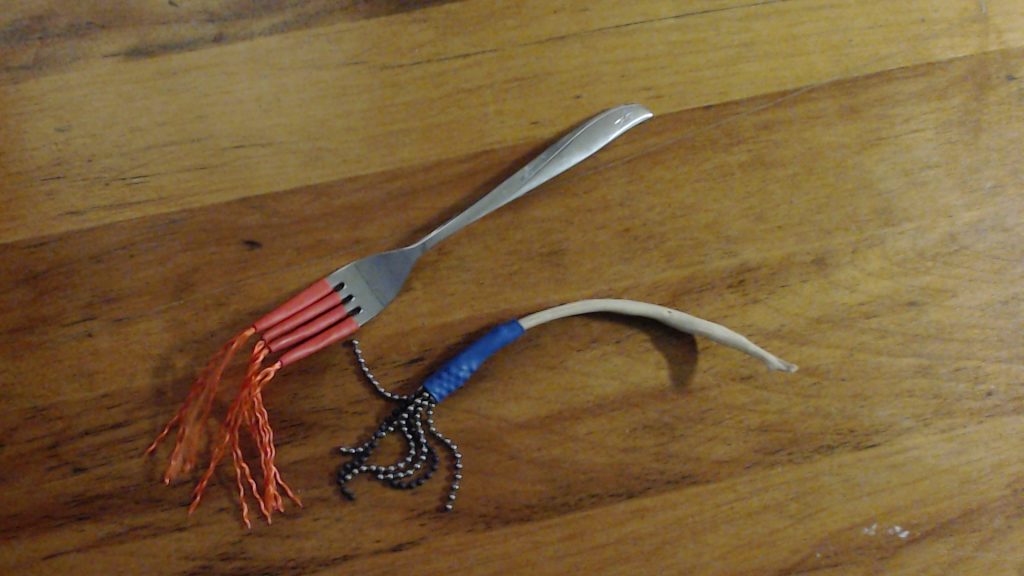
Next, a fork handle with nylon twine bristles and chain bristles with a fish rib handle.
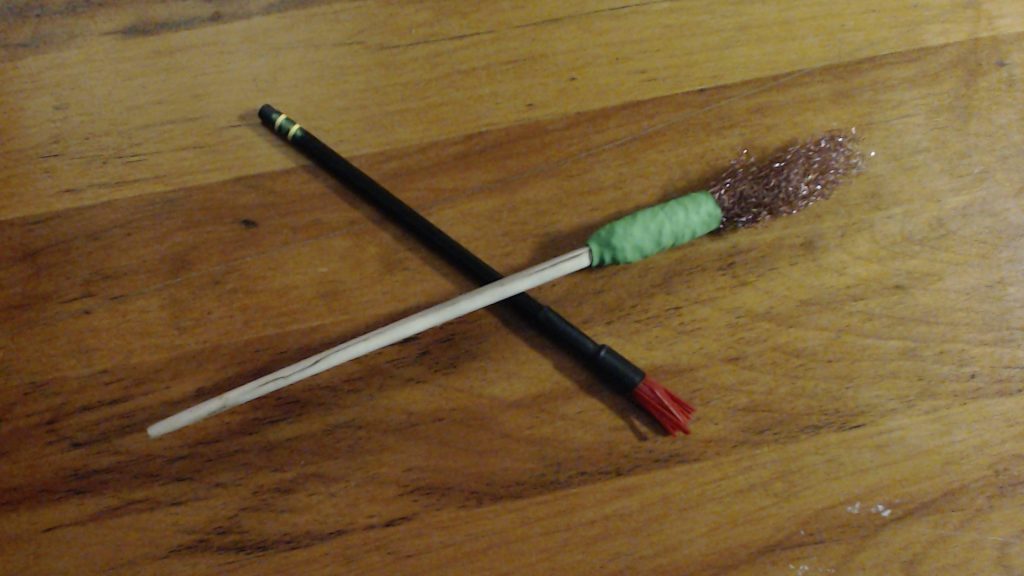
Finally, a pencil handle with zip tie bristles and a chopstick handle with scouring pad bristles.
Materials Needed
You’ll need:
- A handle
- Bristles
- Heat shrink tubing
- Lighter, hair dryer or heat gun
- Scissors
- Masking Tape
Prepare The Handle
Select a handle, ensuring that it’s easy for kids to hold and sturdy enough to withstand the use and abuse of your average early learning setting.
Select Bristle Material
Choose your bristle material. Durability is a consideration, but you can also select more delicate items (cotton batting, grass stems, leaves), knowing the brush may not last long.
When cutting your bristle material, make sure it’s long enough to be fully enveloped by the heat shrink tubing so it will attach securely to the handle. It’s best to make the bristles longer than needed and trim them after shrinking the heat shrink tubing.
Attach The Bristles
The goal is to hold the bristles over the end of the handle and slip on the heat shrink tubing. The personal material will determine the best method for doing this. Sometimes, you can hold the tubing at the end of the handle and slip in the bristle material.
With other bristle material, you may want to tape it at the end of the handle before slipping on the tubing. Ultimately, you may need to wrestle with it until it gives up and you get everything in order.
Ensure the bristles are tightly packed into the heat shrink tubing for best results. This gives you the tightest and most secure bond after shrinking.
Apply Heat
Use a lighter, hair dryer, or heat gun to carefully shrink the tubing, securing the bristles to the handle. Move the heat source evenly to prevent overheating or burning the materials. Try not to set anything ablaze.
As you heat the tubing, you’ll notice it begin to shrink. Heat shrink tubing is primarily available in two types: 2:1, which shrinks to half its original size, and 3:1, which shrinks to a third of its size. This information should be readily available in the product description when you purchase your heat shrink. Know what you’re using so you’ll know how much shrinkage to expect.
A note about hairdryers: they may not produce enough heat. Whether they work or not depends on the hairdryer’s heat output and the amount of heat the heat shrink tubing needs.
Test And Trim The Brush
Once the tubing has cooled, test to ensure your bristles are securely attached. If not, first try adding more heat and inducing more shrinkage. If that doesn’t work, slip on a second layer of heat shrink tubing and heat it.
After testing, trim the bristles to the desired final length to achieve your preferred painting effect.
Handle Ideas
Here are some handle ideas:
- Bones
- Forks
- Chopsticks
- Pencils
- Keys
- Golf tees
- Wooden spoons
- Toothbrush handles
- Drumsticks
- Old markers
- Sticks
- Large bolts
Bristle Ideas
- Feathers
- Steel wool
- Plastic strips
- Rubber bands
- String or rope strands
- Beaded chains
- Cotton balls
- Pipe cleaners
- Foam pieces
- Toothpicks
- Shoelaces
- Yarn
- Dried grass or straw
Wrap-Up
I’ll conclude with this: DIY projects like this are always best when done with the children. Being part of the creation process allows them to learn about materials, build new vocabulary, and experience the creation process. Here’s a link to a post about DIYing with kids.
Contribute content to Playvolution HQ
Brought to you by Explorations Early Learning
Browse Trainings

Post Author

Jeff Johnson is an early learning trainer, podcaster, and author who founded Explorations Early Learning, Playvolution HQ, and Play Haven.
Leave a Reply